A webinar and demo session on Amazon Lex was held on 26th April 2020 starting from 8:30 pm to 10:30 pm NPT.
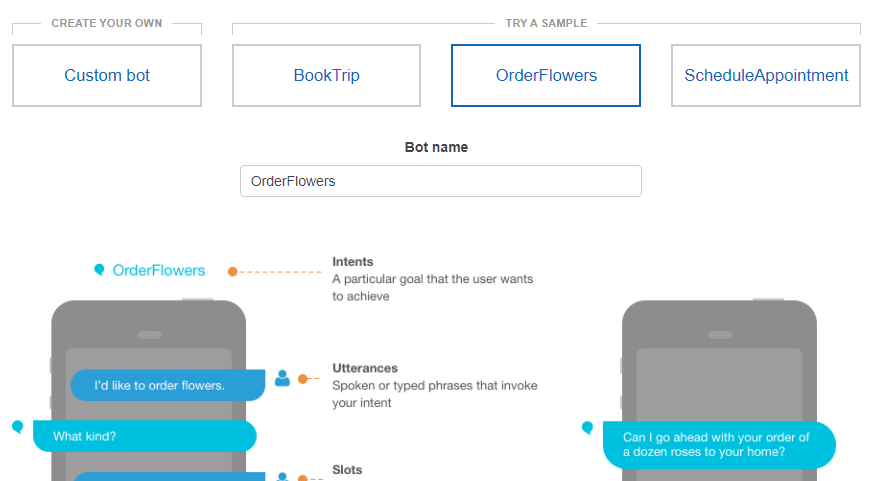
A chatbot is an application that conducts a conversation via text or speech to simulate the way a human would converse. Chatbot has seen growing popularity with various applications to assist in business needs. There are various tools and services available to develop a chatbot, but it has always been a complicated one to start.
Among various other services, Amazon has been offering a service that not only helps to create the chatbot but makes the task easier than ever before. Amazon Lex is a service provided by AWS for building conversational interfaces into any application using voice and text. It is the same technology that is being used by Alexa under the hood. Amazon Lex also provides functionality like speech recognition, natural language understanding that can be used to create a highly engaging conversational interaction without having to know about machine learning and such.
Amazon Lex enables any developer to build conversational chatbots quickly and easily. With Amazon Lex, no deep learning expertise is necessary—users just specify the basic conversational flow directly from the console, and then Amazon Lex manages the dialogue and dynamically adjusts the response. The whole session was enlightened towards creating a chatbox with Amazon Lex.
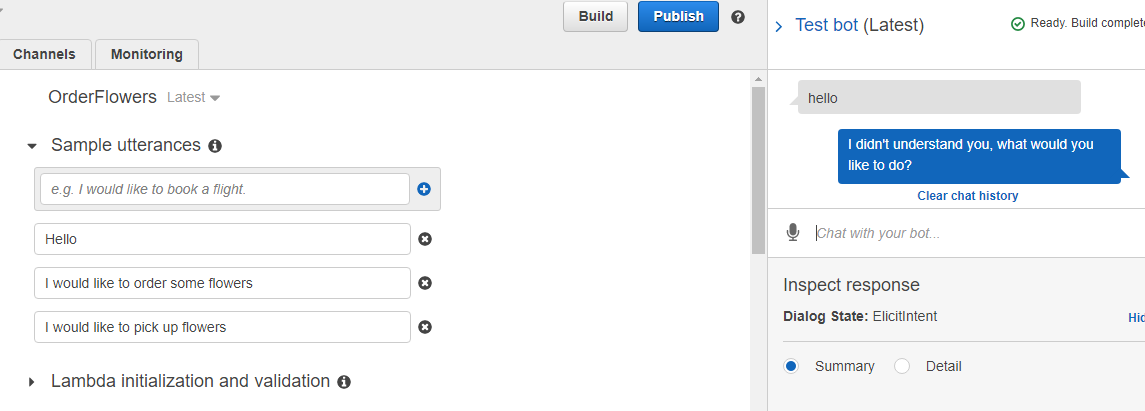
How to launch a sample Chatbot and use the chatbot web UI.
We will be using a prebuilt sample for this article. You will require an AWS account for this if you don’t have one you can register for free at aws.amazon.com/free
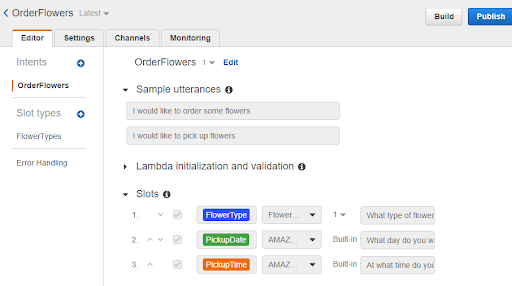
Creating an Amazon Lex Bot
Head over to the console and search for the Amazon Lex service or navigate directly to this link: https://console.aws.amazon.com/lex/home
- On the Create your Lex bot page, provide the following information and then choose to Create.
- Choose the OrderFlowers blueprint.
- Leave the default bot name (OrderFlowers).
- For COPPA, choose No.

- Choose to Create. The console makes the necessary requests to Amazon Lex to save the configuration. The console then displays the bot editor window.
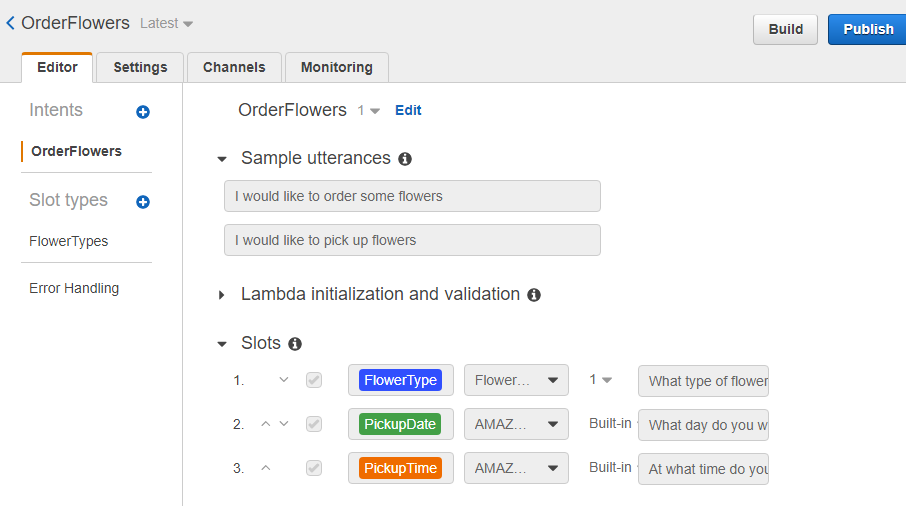
- Wait for confirmation that your bot was built.
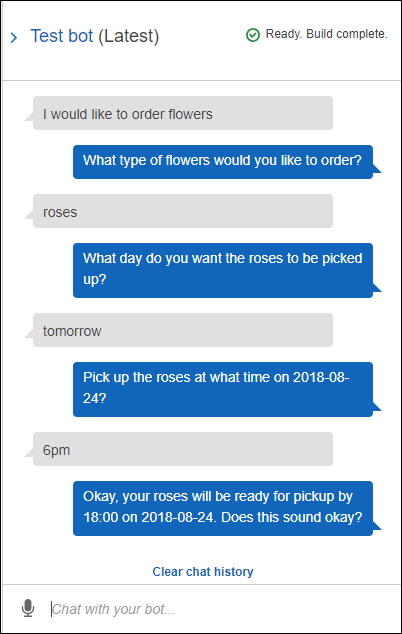
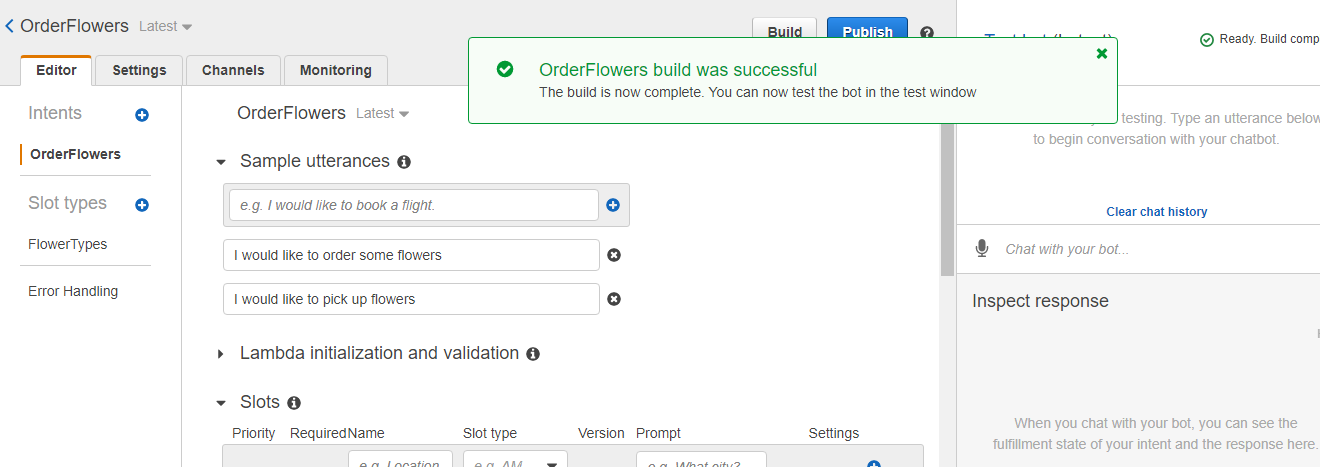 . Test the bot.
 - Note: Users can test the bot by typing text into the test window, or, for compatible browsers, by choosing the microphone button in the test window and speaking. Use the following example text to engage in conversation with the bot to order flowers:
- Note: Unless you Choose Build, the changes made in the system will not be effective. So, recall choosing the Build to make the change in bot effective.
 Furthermore, a sample input was also taken in order to check the accuracy of the bot which resulted as below:
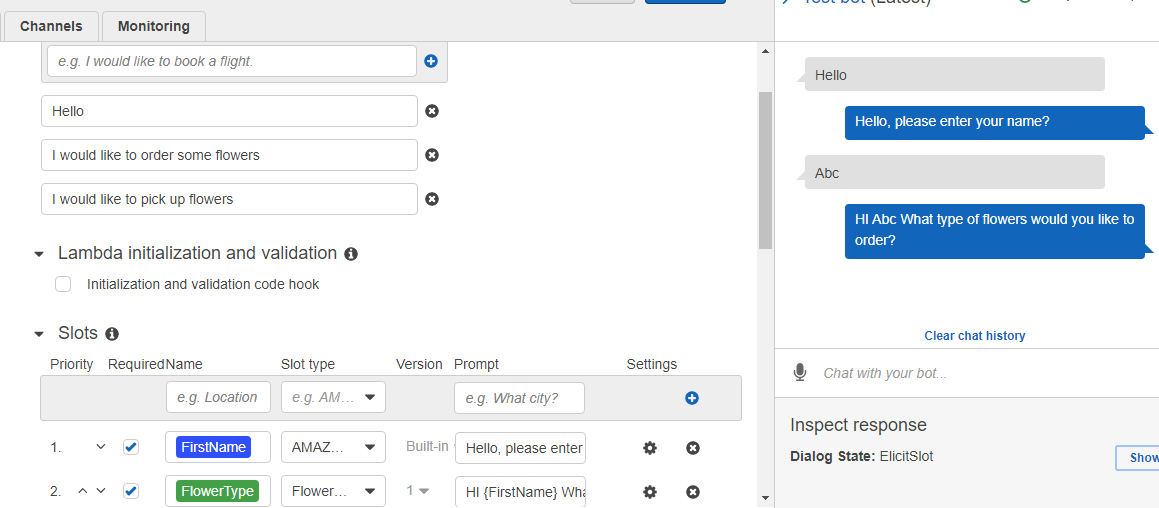
- Deploy a Web UI for the bot:
The AWS-sample has a prebuilt cloud formation that you can use to quickly deploy the web UI for the lex bot that you can integrate on your own site.
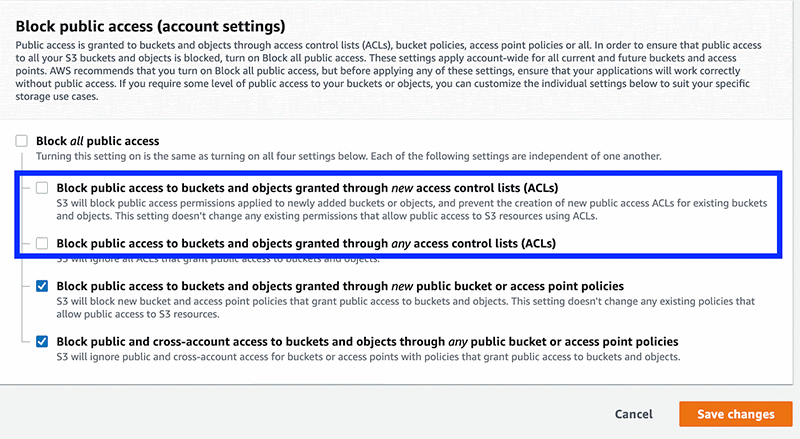
- Prerequisite: Before installing the chatbot UI, make sure your AWS account is configured to allow S3 objects to have public read access. Open the S3 settings page Block public access (account settings), and if needed, choose Edit and uncheck the options to block public access on objects granted through access control lists (ACLs), as shown below:
- Deploy the chatbot UI to kick the tires.
- Press the Launch Stack button for the Region in which you will use your chatbot: Accept all default parameters.
North Virginia: CloudFormation
Oregon: CloudFormation
- Ireland: CloudFormation
Sydney: CloudFormation
This deploys a demonstration environment in your account (in the us-east-1 AWS Region) and installs the OrderFlowersBot. If you would like to use your existing bot enter the name of the bot under the section LexBot Configuration Parameters 
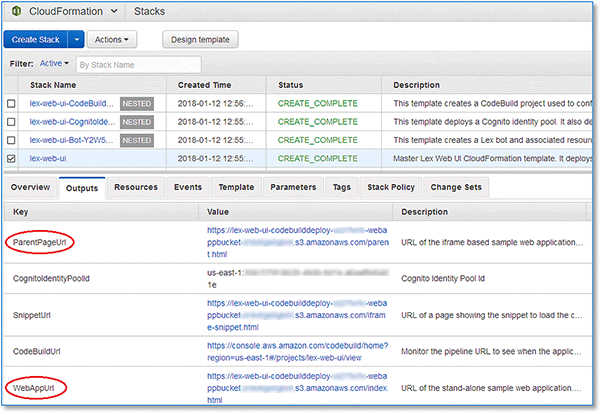
- After AWS CloudFormation launches the stack (the status is CREATE_COMPLETE), open the Outputs tab. Choose WebAppUrl or ParentPageUrl to experiment with the chatbot UI:
- The stack deploys the following architecture. It is completely serverless ˗ charges are based on your service usage.
After you’ve got a sense of how the chatbot UI works, try it with your own Amazon Lex chatbot and integrate it into your website. Here’s how:
- Launch the AWS CloudFormation stack.
CloudFormation - In the Lex Bot Configuration Parameters section:
- For BotName, type your bot’s name.

- Set EnableCognitoLogin to true to enable integrated user login otherwise false.

- In the Web Application Parameters section, complete each of the parameters.
Note: It’s essential that you use your site’s origin for WebAppParentOrigin. - After AWS CloudFormation launches the stack (the status is CREATE_COMPLETE), you will see a link on the Outputs tab in the
- SnippetUrl output value:
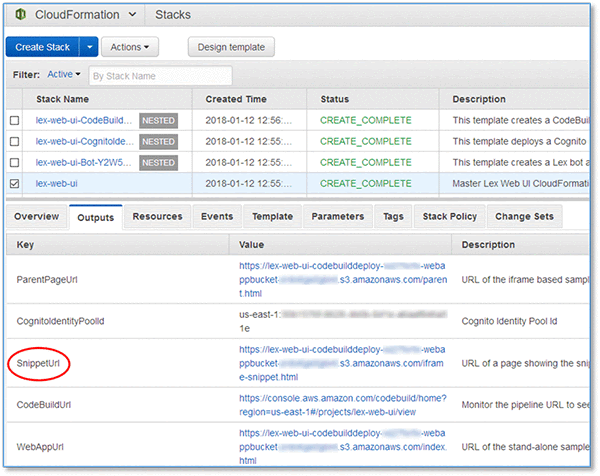
- Browse to the SnippetUrl page, where you will see a code snippet similar to the following that you can paste into your application:
 All in all, the session was a fruitful one with the attending officials showing great interest in implementing the ideas to develop and retain talents in our country Nepal. Lastly, one major thing that makes the webinar more exciting and fruitful was participants were very interactive and the intercommunication between the participants and the facilitators was very smooth and effective which resulted in a great impact on learning for all the attendees. In a nutshell, the webinar was a complete success as the response from the event was overwhelming with enthusiastic participants enrolled and was able to attract the attendees of varied career levels and was commended as fruitful by most of the attendees.
Video (Creating a chatbot with Amazon Lex)
- Launch the AWS CloudFormation stack.
- Wait for confirmation that your bot was built.
Medium Posts
