OCR stands for Optical Character Recognition, this technology enables the conversion of different types of documents into editable and searchable data. This blog provides a step by step procedure on a small part of the application on EC2 servers. It highlights the process of configuring two distinct servers with separate roles, both tasked with performing operations on a shared S3 bucket.
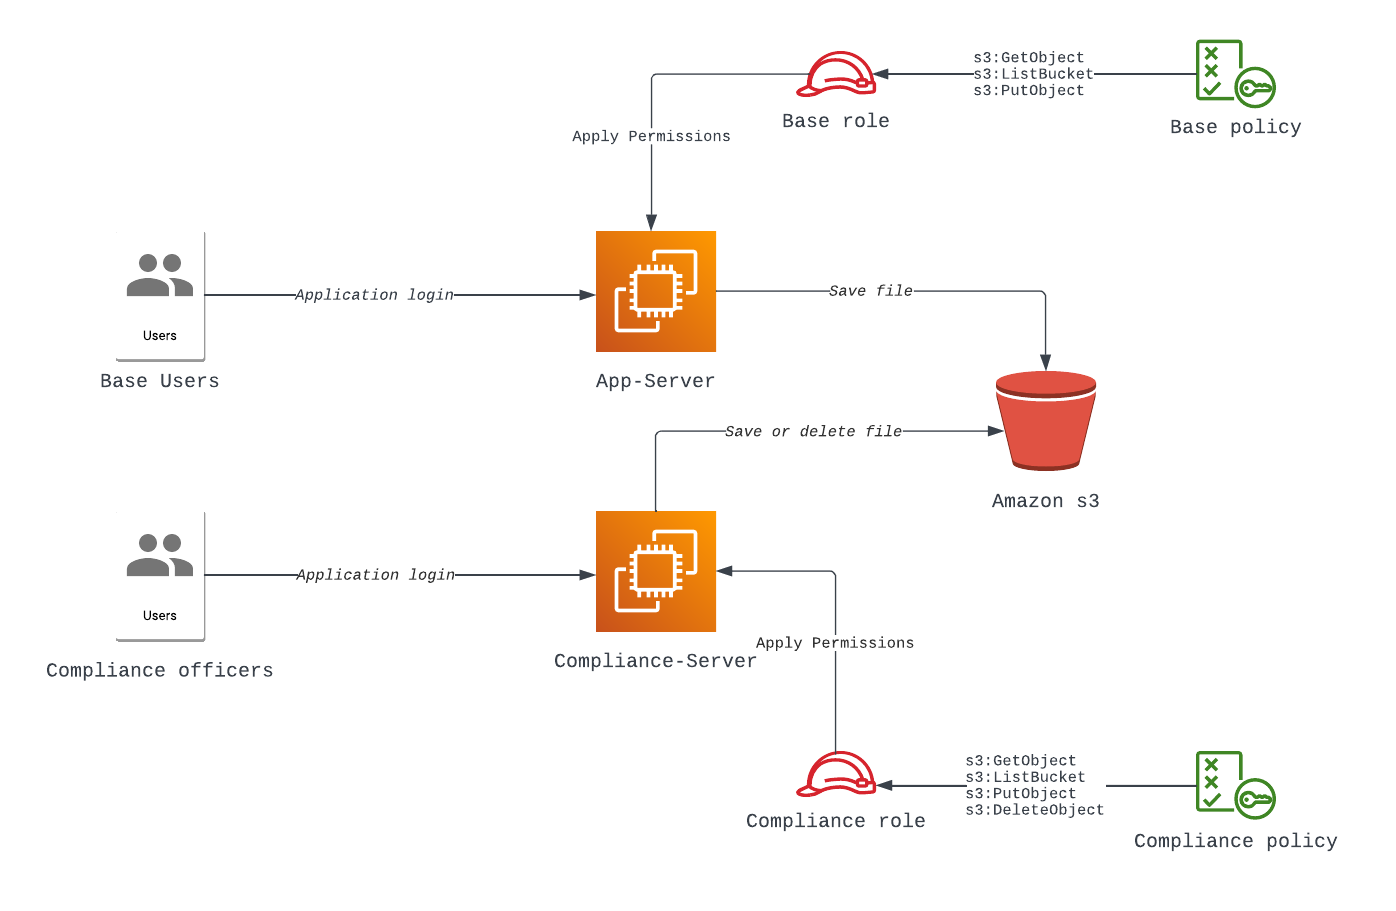
There are two distinct servers, the App server and the Compliance server, each designated with specific roles: the Base Role and the Compliance Role. Separate policies will be generated for these roles and subsequently linked to their respective servers.
Understanding OCR Technology
OCR technology is crucial for converting text from scanned documents, images, and PDFs into digital format. With sophisticated algorithms, OCR allows for the extraction and manipulation of text data, making tasks like document management and data extraction much more efficient.
Step I: Setting up S3 bucket and policies for different roles
The first step involves setting up an S3 bucket, which will serve as the repository for our documents. Begin by navigating to S3 and create a bucket.
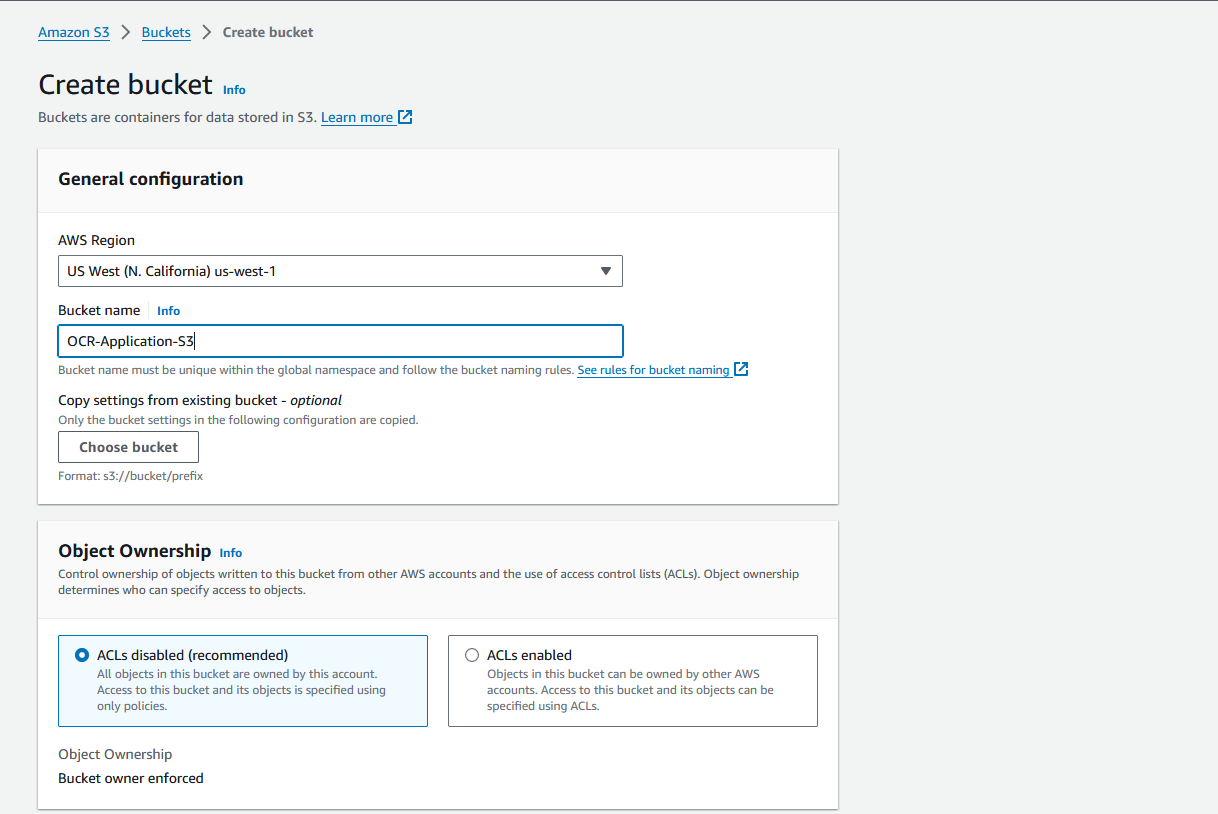
Once the bucket is successfully created, proceed to IAM > Policies to create policies for our server roles.
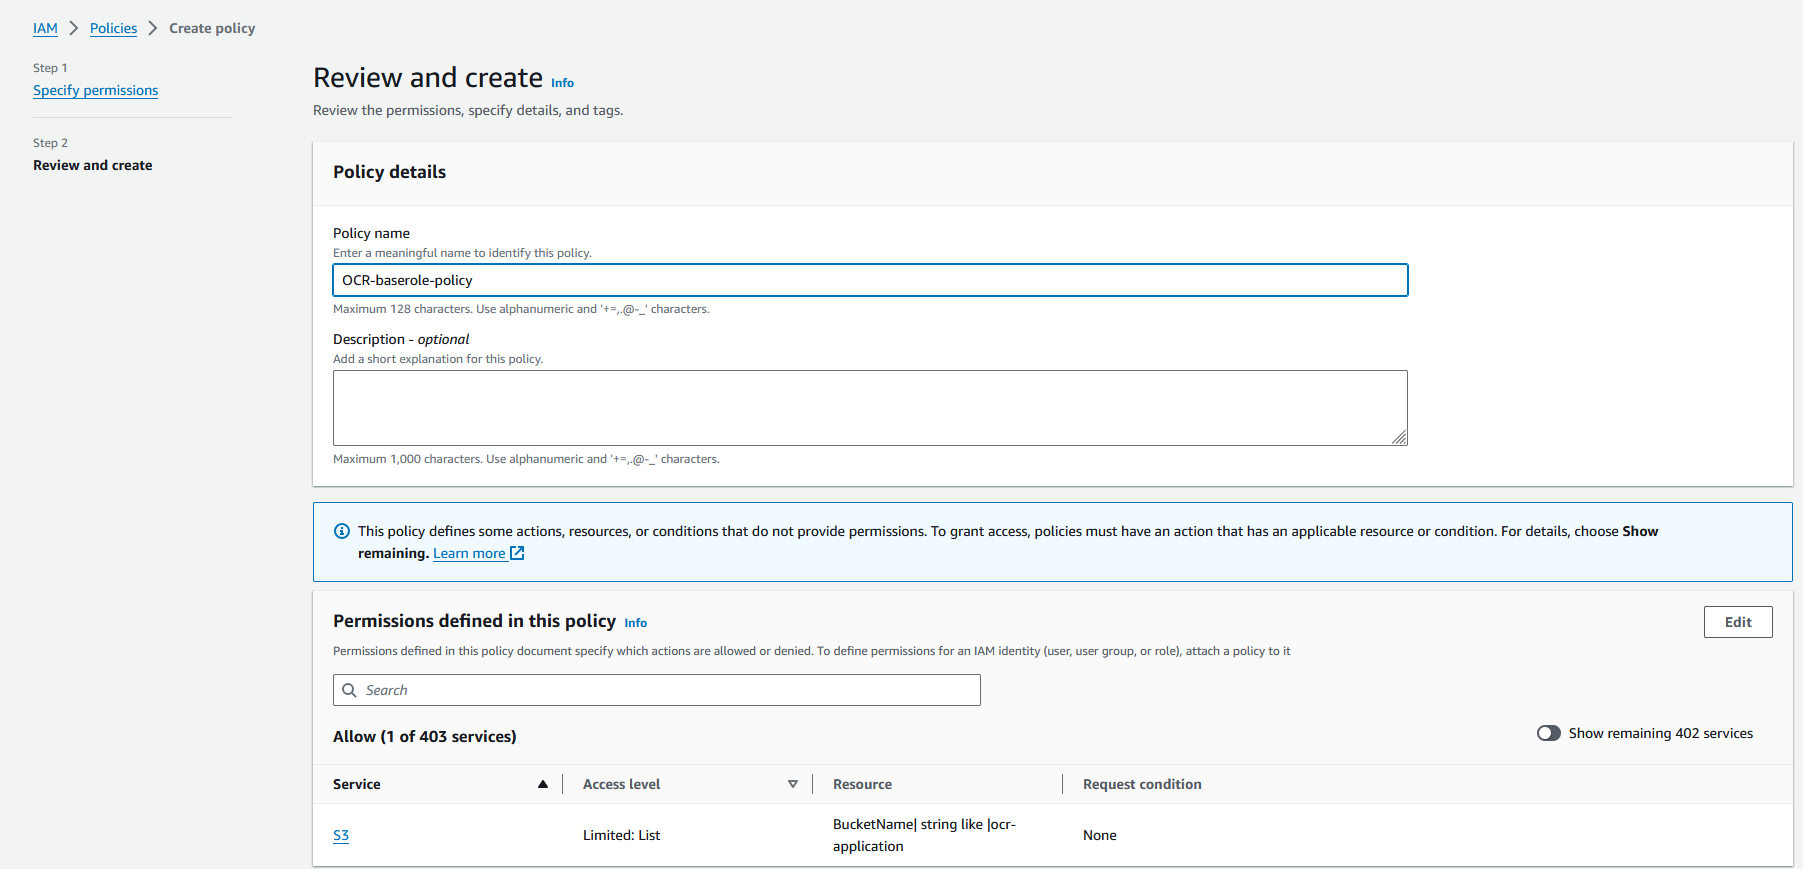
This is the base policy with permission for S3:GetObject, S3:ListBucket, S3:PutObject. The policy looks like this:
{
“Version”: “2012-10-17”,
“Statement”: [
{
“Sid”: “VisualEditor0”,
“Effect”: “Allow”,
“Action”: [
“s3:PutObject”,
“s3:GetObject”,
“s3:ListBucket”
],
“Resource”: “arn:aws:s3:::ocr-application/*”
}
]
}
Next, create another policy for the Compliance role, granting permissions for S3:ListBucket, S3:GetObject, S3:PutObject, and S3:DeleteObject actions. Here’s an example of how this policy is structured:
{
“Version”: “2012-10-17”,
“Statement”: [
{
“Sid”: “VisualEditor0”,
“Effect”: “Allow”,
“Action”: [
“s3:PutObject”,
“s3:GetObject”,
“s3:ListBucket”,
“s3:DeleteObject”
],
“Resource”: “arn:aws:s3:::ocr-application/*”
}
]
}
Step II: Creating roles and launching EC2 instances
We will create two distinct roles: Base Role and Compliance Role. These roles define the permissions granted to our servers. For each role, we attach the corresponding policy created in Step I.
Go to IAM > Roles and click on create role, since we are creating roles for our EC2 servers, select EC2 as the use case.
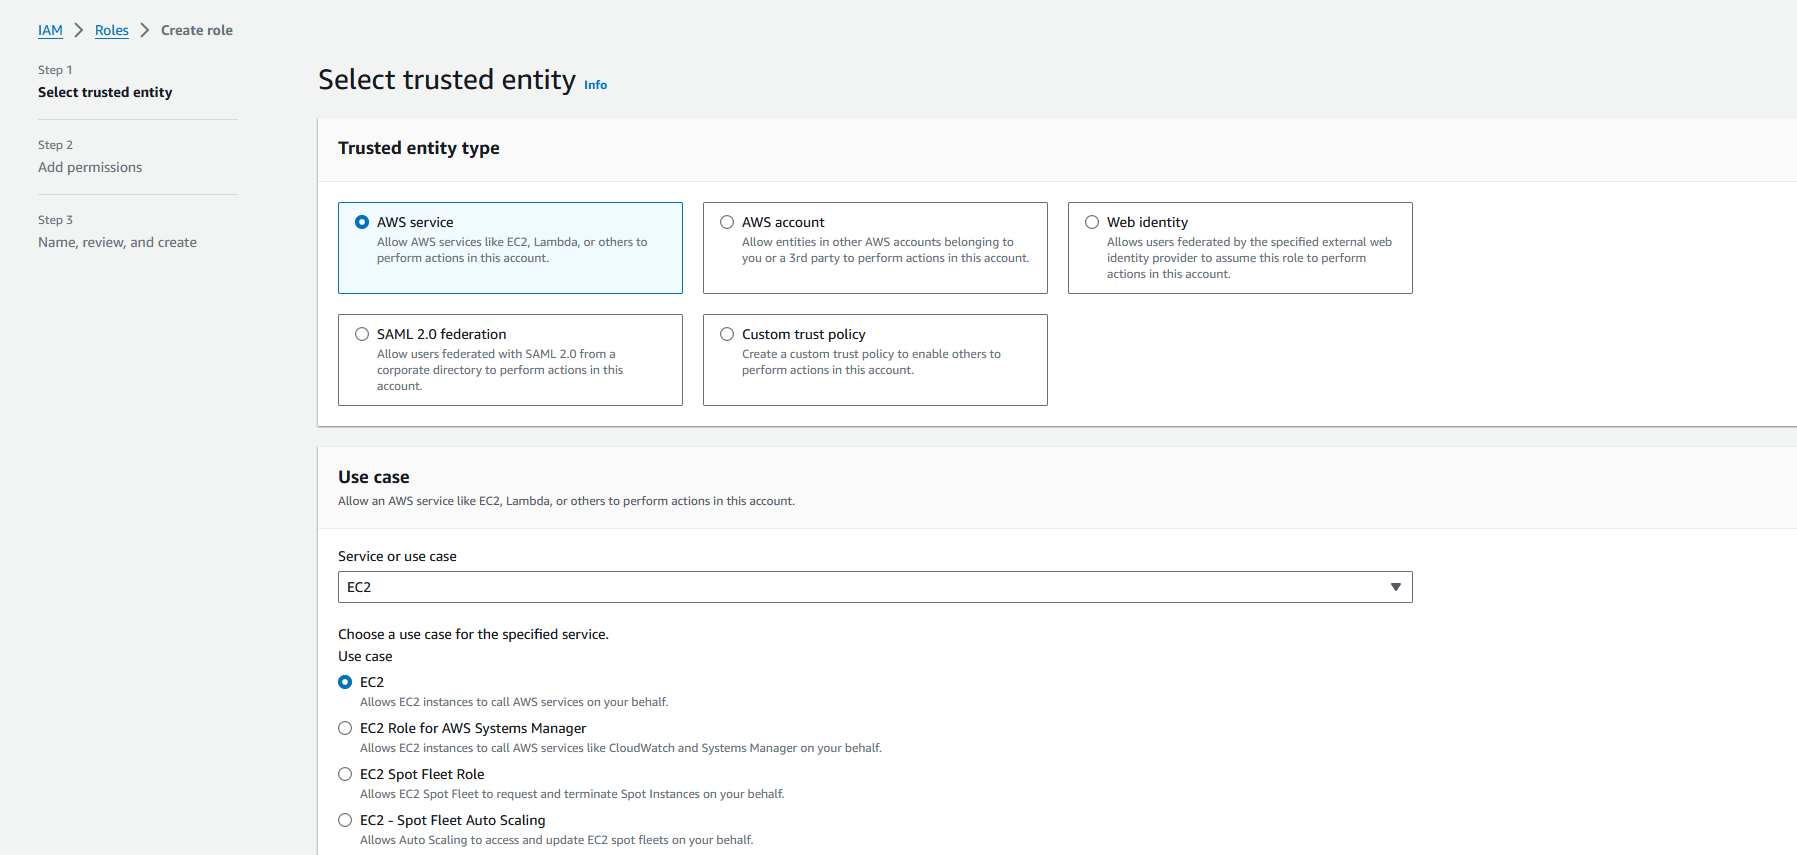
In the Add Permissions tab, select the respective policies created earlier. Repeat this process for both the Base role and Compliance role. After the roles are configured then it’s time to launch the EC2 instances. Go to EC2 and click on launch instance.
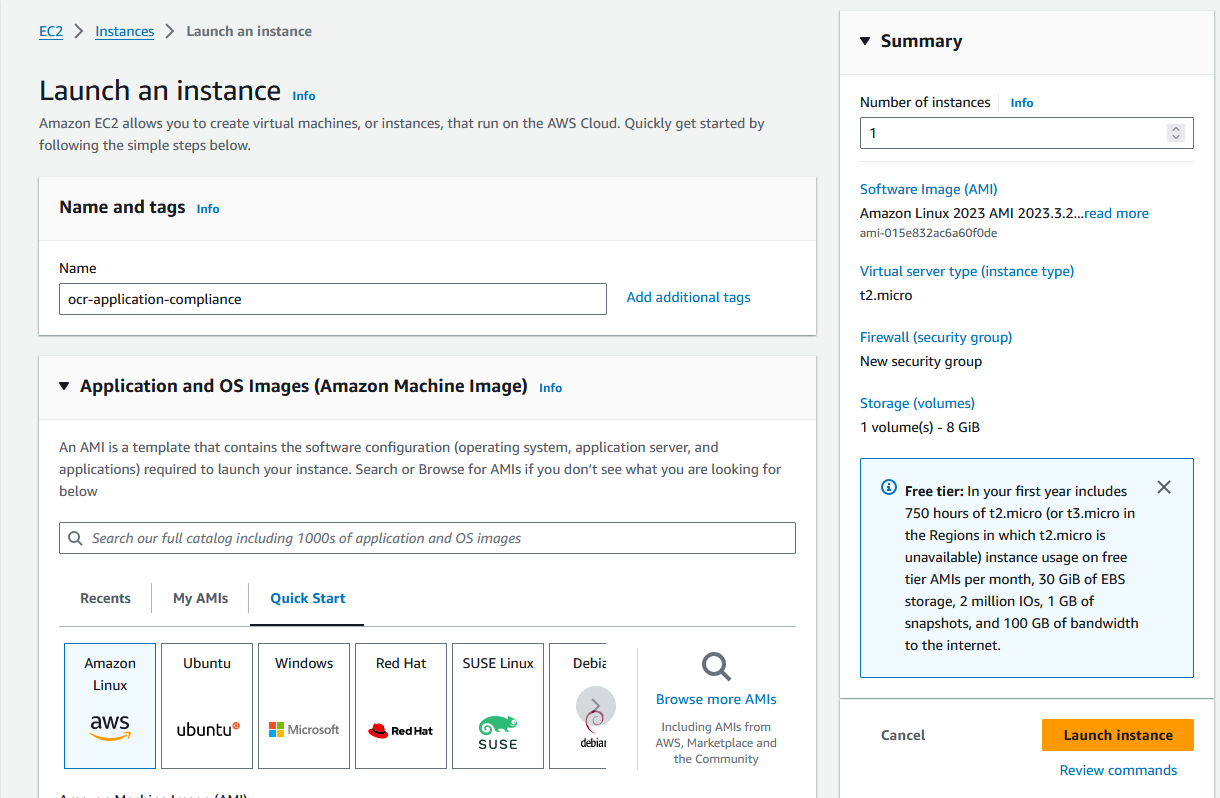
Select Amazon Linux Image, select your required instance type and key pair, leave everything else as default.In the advanced details section, under IAM instance profile, select the role created earlier and click on launch instance.
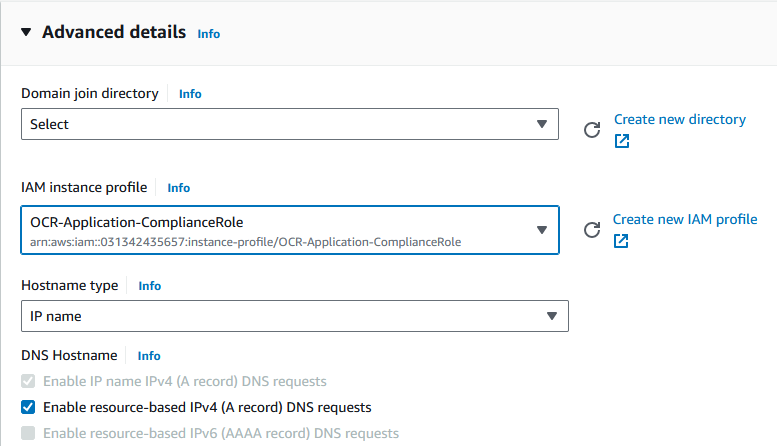
Create two instances (App-Server and Compliance-Server) with the respective roles.
Testing Permissions
We will conduct tests to validate the permissions associated with each role. Now connect to the base instance using SSH, and try to upload a file into the S3 this would look like this :

You should be able to upload the file but if you try to remove the file from the bucket you should get an error like :

Again if you go ahead and connect to the Compliance server then you can perform all the functions as the base server along with this you can also delete the files in the S3 bucket :

In conclusion, by following these steps, you can effectively set up S3 buckets and policies for different roles, as well as create and launch EC2 instances with the appropriate permissions. This setup ensures that each role has the necessary access to perform its designated tasks, thereby enhancing security and control within your AWS environment.
 Finland
 Bangladesh