A powerful tool provided by Amazon Web Services (AWS), CloudFormation enables users to provision and manage cloud services using code. It makes it easier to define infrastructure with templates that describe how various resources such as RDS databases, S3 buckets, and EC2 instances should be set up. By utilizing CloudFormation, complex infrastructures can be automatically deployed, consistency is maintained across environments, and configuration replication is simple. This improves cloud application scalability and maintenance by simplifying the control of infrastructure as code.
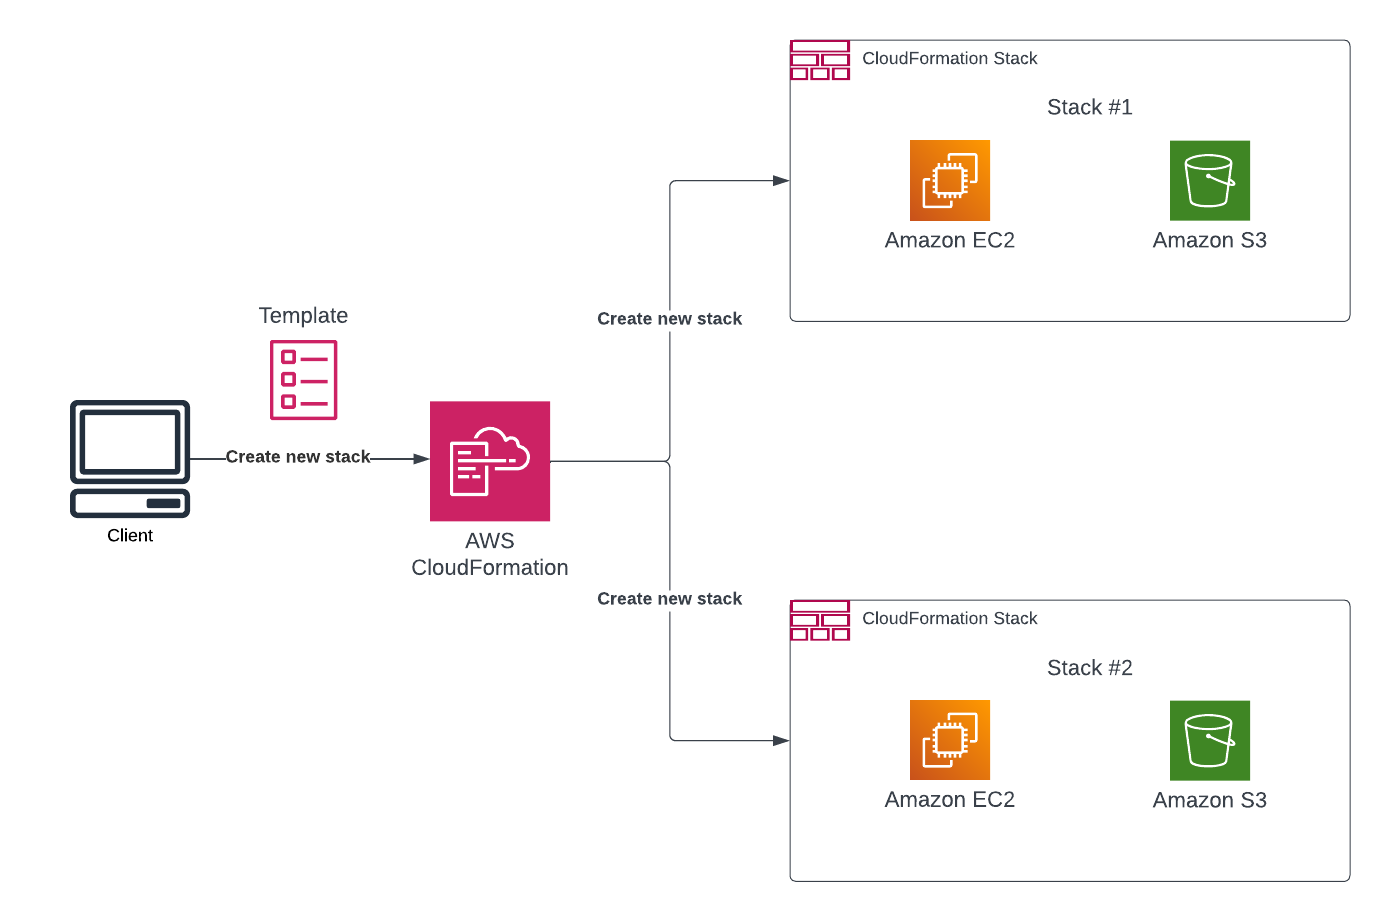
Firstly, we will use CloudFormation to create resources, or stacks. The specifications for these resources are included in a file called a CloudFormation template. What is a template’s greatest benefit? It’s reusable! This is where CloudFormation comes in quite handy when building stacks. Code can be used to create resources, and when needed, the template can be saved for later deployment. You can also keep the template in your S3 bucket on the cloud, which guarantees longevity and has an eleven-nine reliability rating.
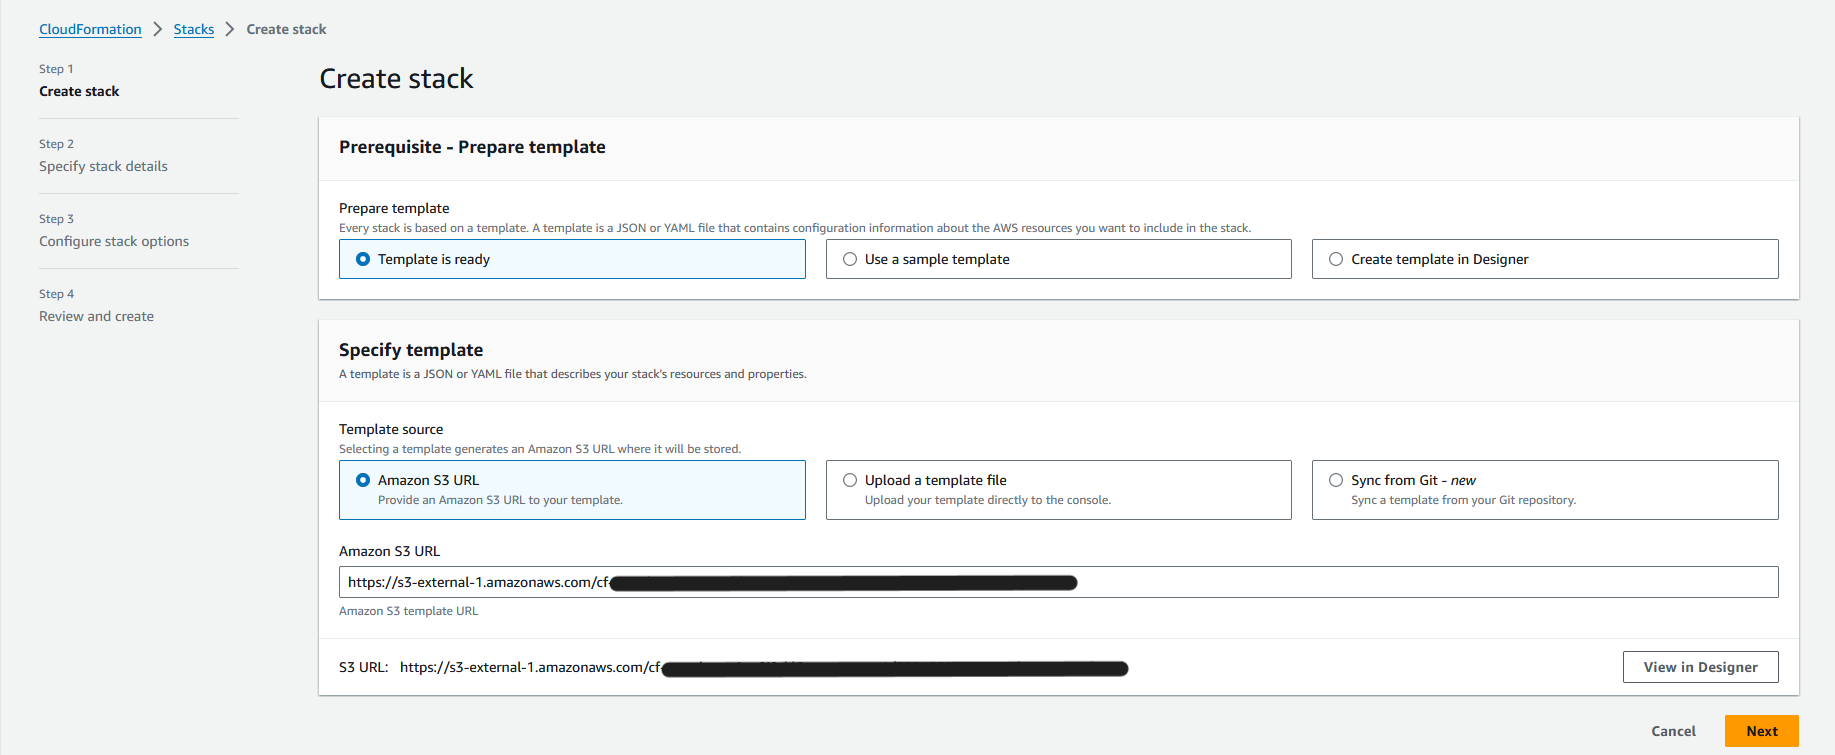
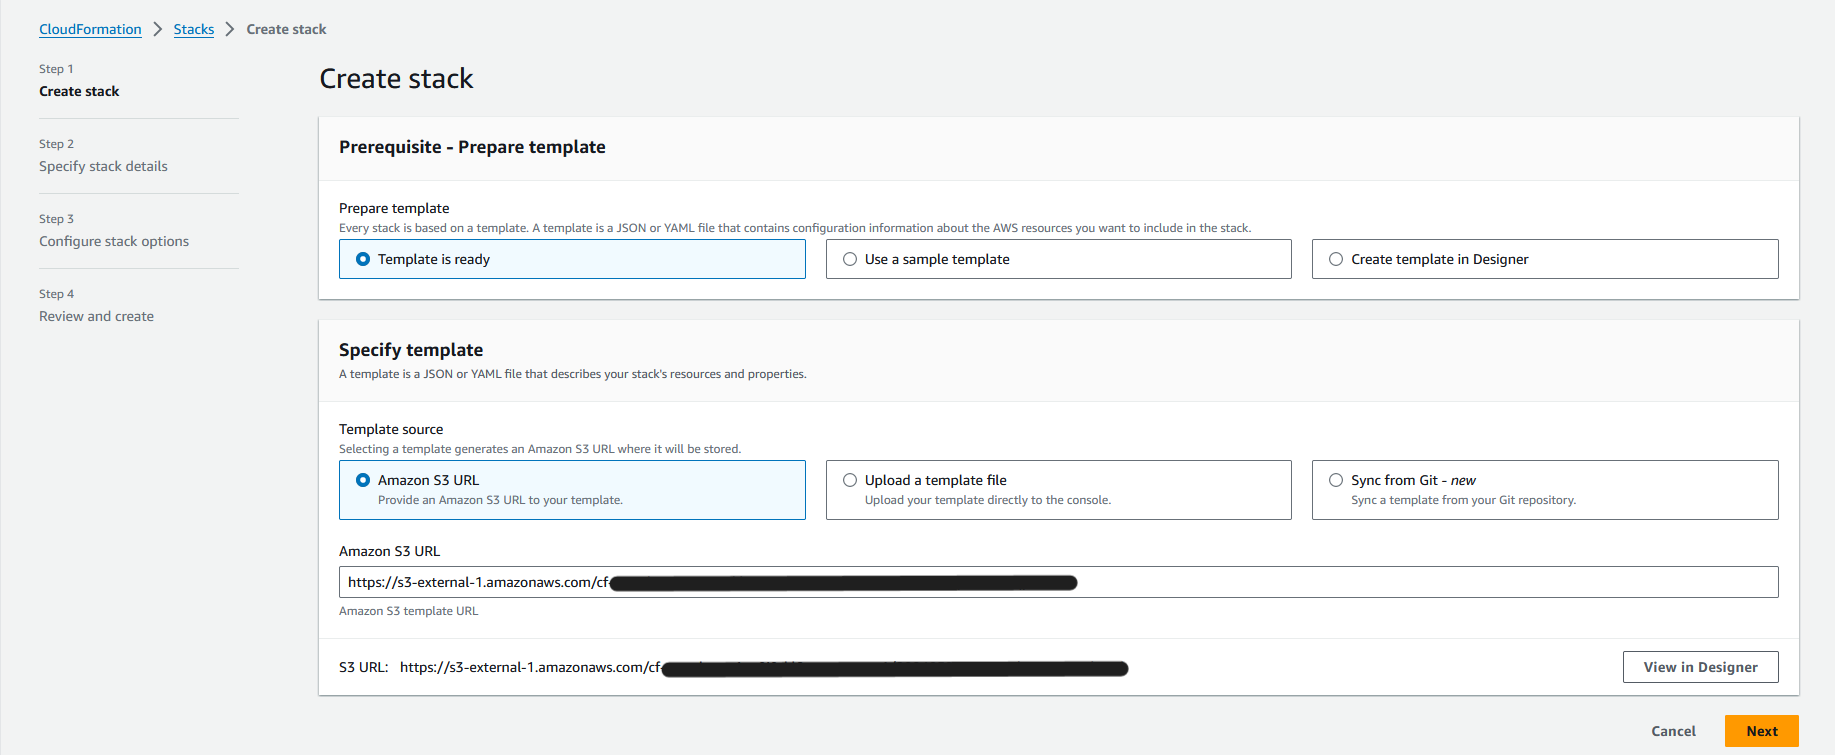
- Go to Cloudformation in your AWS console and click on “Create Stack”.
- Select “Create template in designer” and click on “Create template in designer”.
3. Select “YAML” and select “template” at the bottom.
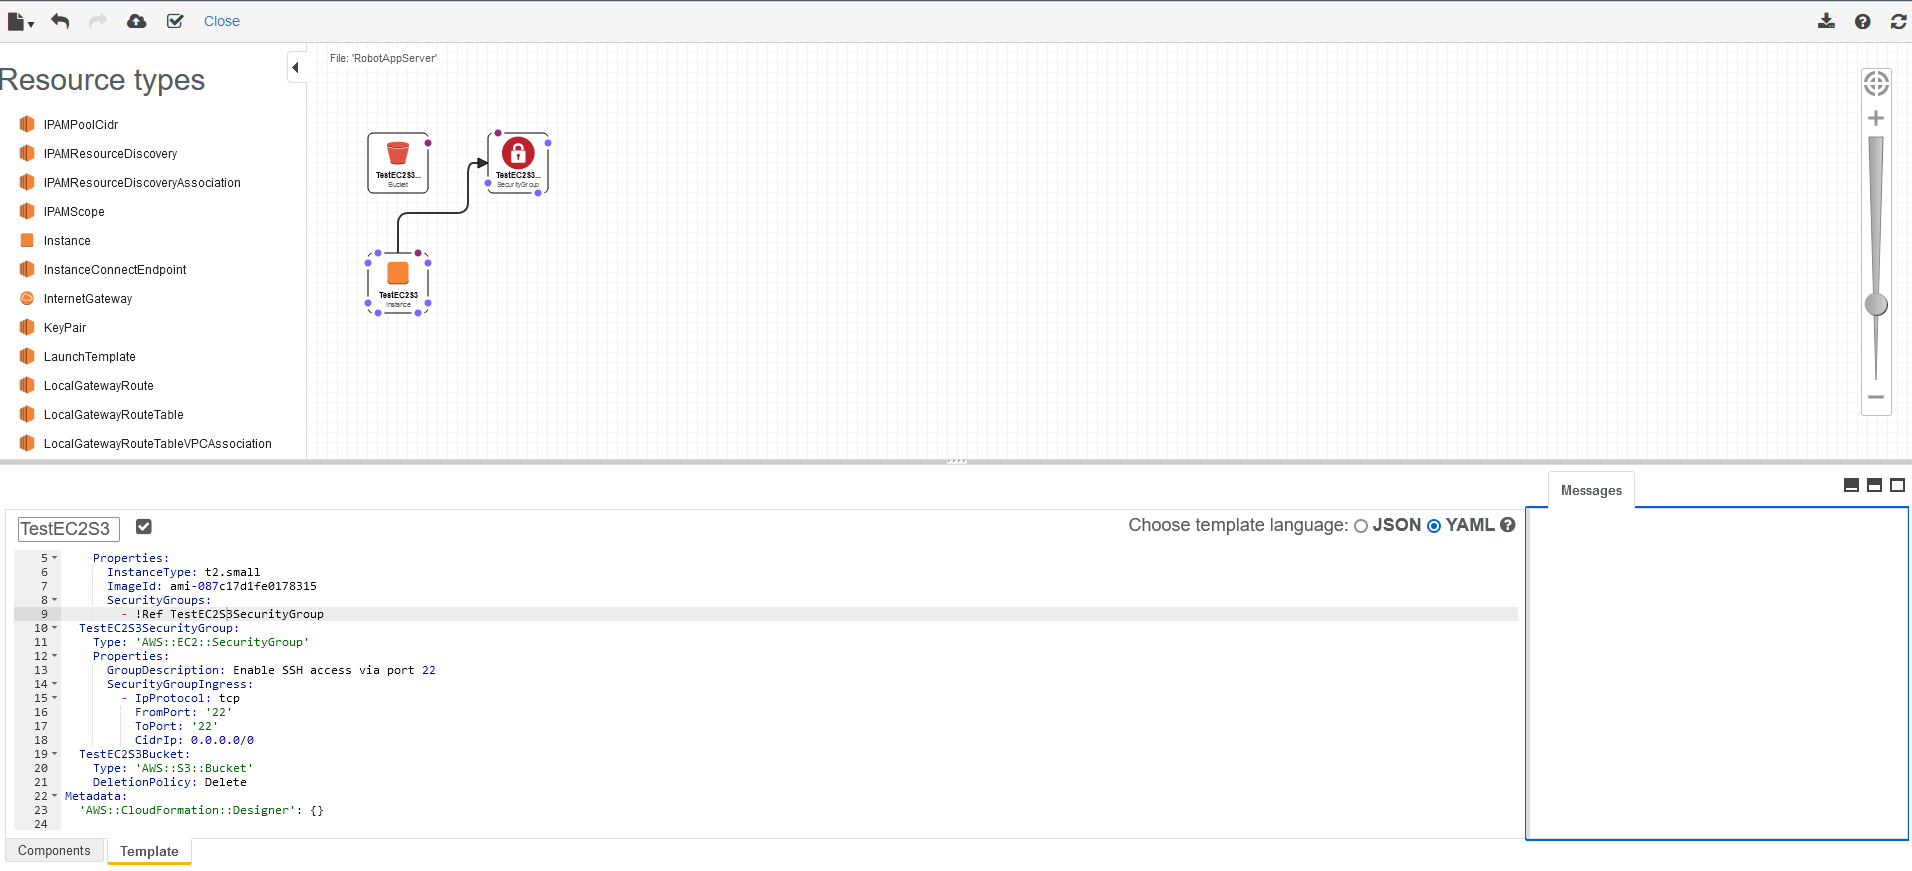
4. Copy and paste the code below in the code section.
AWSTemplateFormatVersion: 2010-09-09
Resources:
TestEC2AppServer:
Type: ‘AWS::EC2::Instance’
Properties:
InstanceType: t2.small
ImageId: ami-087c17d1fe0178315
SecurityGroups:
– !Ref TestEC2S3AppSecurityGroup
TestEC2S3AppSecurityGroup:
Type: ‘AWS::EC2::SecurityGroup’
Properties:
GroupDescription: Enable SSH access via port 22
SecurityGroupIngress:
– IpProtocol: tcp
FromPort: ’22’
ToPort: ’22’
CidrIp: 0.0.0.0/0
TestEC2S3Bucket:
Type: ‘AWS::S3::Bucket’
DeletionPolicy: Delete
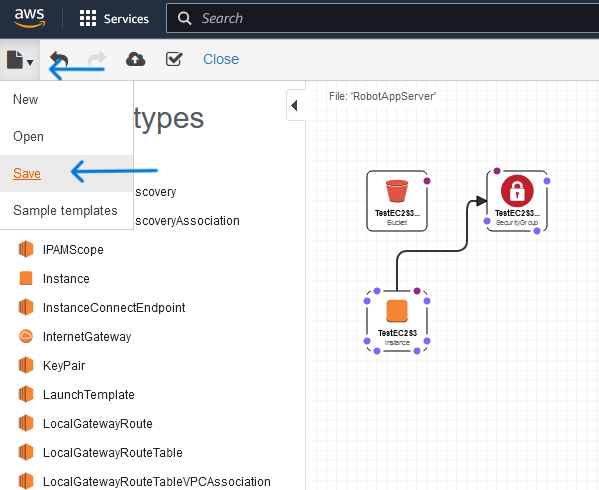
5. After this click on save as shown below. You will have 2 choices either save in the S3 or your local system. Choose S3 and select “save”.
The instance is linked to the security group for safeguarding. Subsequently, we’ll store the template in our S3 bucket, enabling us to effortlessly deploy another stack of resources (comprising an EC2 instance and a security group) whenever required. Furthermore, should we need to adjust the instance type from t2.small to t2.large, or vice versa, we can seamlessly do so, provided we have the template saved.
6. After you save the template, click on the “Create Stack”, it’s the cloud icon on the top.
7. Click on next and leave everything as it is and create a stack.
8. After the stack creation is successful then in the cloudformation events you will see “CREATE_IN_PROGRESS”.

9. You can check if the instance is created or not by going to the EC2 page.

To provide a clearer depiction of our process, we construct a new stack consisting of AWS resources, such as an EC2 instance. We generate the template using CloudFormation. Consequently, in the CloudFormation stack, you can observe the running EC2 instance. Initially, we utilized a t2.micro instance, and then we upgraded to a t2.small for our subsequent stack. Following the creation of the template and stack of resources, we stored everything in our S3 bucket. With the template saved in the bucket, we can easily use the same stack that is stored in the S3 and launch the stack.
 Finland
 Bangladesh
