 International
 Finland
 Bangladesh
A webinar and demo session on Getting Started with AWS Lambda using Node JS was held on 15th May 2020, Friday starting from 5:00 pm to 7:00 pm NPT.
The whole session started with an introduction to AWS Lambda and a hands-on demo which will explain How to Get Started with AWS Lambda using Node JS.
AWS Lambda is an event-driven, serverless computing platform provided by Amazon as a part of Amazon Web Services. It is a computing service that runs code in response to events and automatically manages the computing resources required by that code. AWS Lambda lets users run code without provisioning or managing servers. With Lambda, users can run code for virtually any type of application or backend service – all with zero administration. Just upload the code and Lambda takes care of everything required to run and scale your code with high availability. Users can set up their code to automatically trigger from other AWS services or call it directly from any web or mobile app.
AWS Lambda Use cases:
- As an event-driven compute service
- AWS Lambda uses code in response to the events.
Example: AWS S3 (Different events)
- As a compute service
- AWS Lambda uses code in response to HTTP requests.
Example: API Gateway (Making API calls)

Fig: Illustration of How AWS Lambda works
One major factor which makes the AWS Lambda more popular and mostly liked by the users is its scalability. It scales the running environment automatically as per the memory allocation to run the function. For example: When memory allocated to a function is increased from 128MB to 500MB, parallelly it also increases the processing power, networking capabilities and so on.
Similarly, lambda functions also can be triggered by HTTP requests. For this, we should make use of API Gateway services in between to create the API Endpoints.
This is the case when a single request is made to the Lambda function through API Gateway.

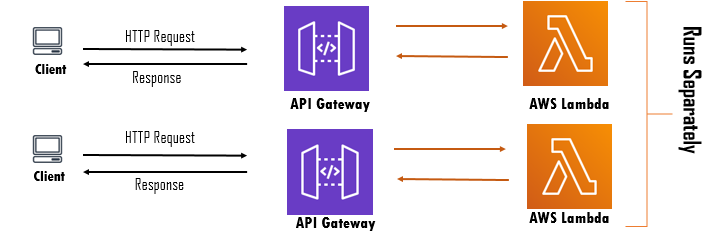
When multiple HTTP requests are made to a lambda function at the same time, each request executes the function separately i.e. independently. Behind the scene, each new request runs on a new container separately. So, when thousands of requests are made, thousands of containers run in the background.
This is the case when multiple requests are made on the Lambda function.
In layman terms, Serverless Architecture is what a company uses to streamline its IT mechanisms, being provided by a vendor company. Though the serverless architecture does have the servers, it’s just that the company is not managing them anymore, unlike traditional servers.
Serverless architecture is a way to build and run applications and services without having to manage infrastructure. User applications still run on servers, but all the server management is done by AWS. Serverless can also mean applications where server-side logic is still written by the application developer, but, unlike traditional architectures, it’s run in stateless compute containers that are event-triggered, ephemeral (may only last for one invocation), and fully managed by a third party.
However, the difference between Traditional and Serverless architectures can be illustrated via the below image:

In serverless, you pay for what you use which means you incur a cost when code runs, you pay per byte of storage actually used, and the hidden infrastructural support for scaling all of this is built into these numbers. It’s truly a metered service. For example, on AWS Lambda you pay $0.20 per million requests when code is executed. In practice, this typically means you can pay 70–90% less for your infrastructure compared with even the cloud equivalent.
Therefore, Scaling is also a gift for startups. Usually, the gap between the Minimum Viable Product and ‘Production Ready’ can mean rewriting and redesigning the app.
You can build serverless backends using AWS Lambda to handle web, mobile, Internet of Things (IoT), and 3rd party API requests. Take advantage of Lambda’s consistent performance controls, such as multiple memory configurations and Provisioned Concurrency, for building latency-sensitive applications at any scale.
You can also build:
- Real-time file processing
- Real-time stream processing
- Extract, Transform, Load

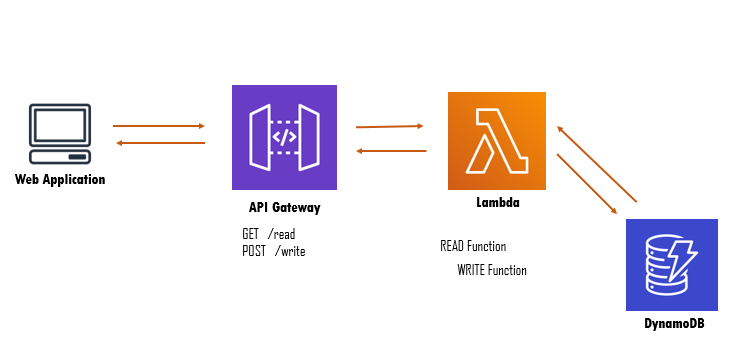
Fig: Demo of Architecture
Below are the steps to Get Started with AWS Lambda using Node JS:
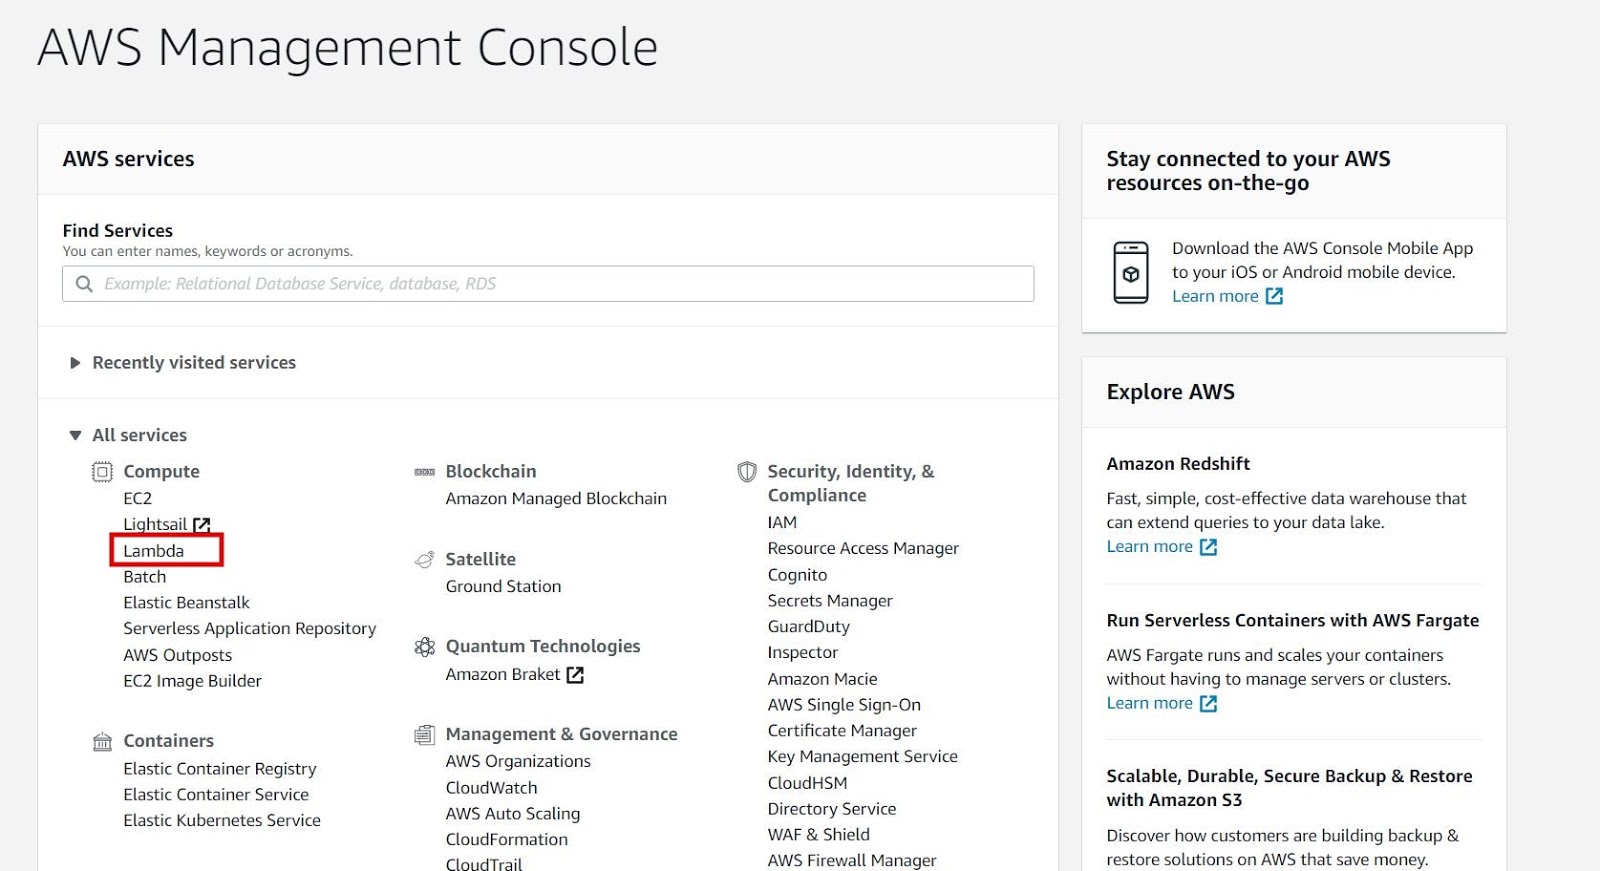
Step 1: Go to AWS Management Console and choose Lambda under compute category service.
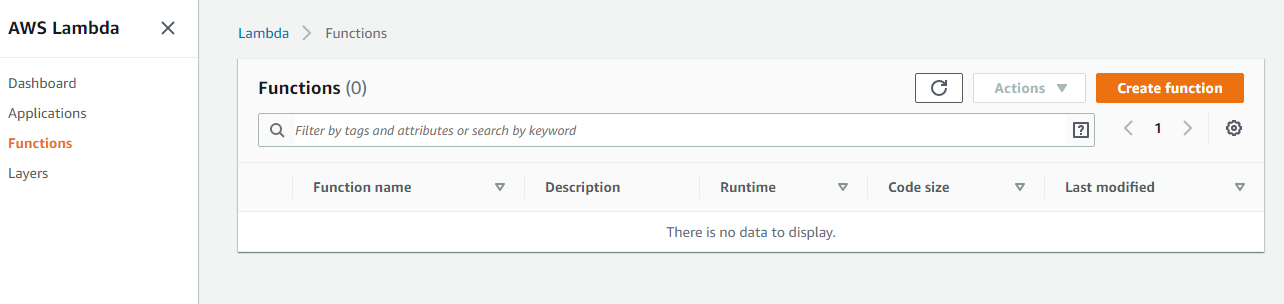
Step 2: Choose Create Function.
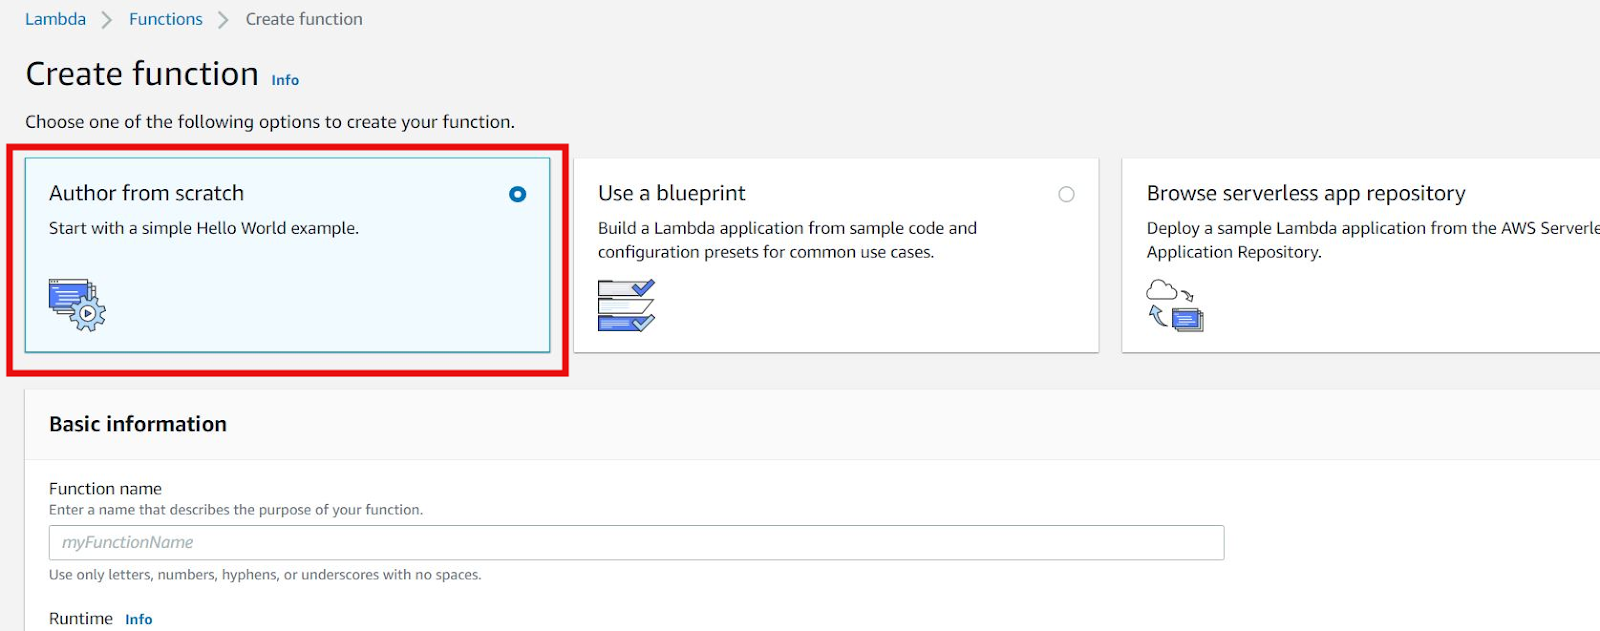
Step 3: Choose Author from scratch.
We also can choose the other two options if we want to work on already built functions blueprints. Here we are choosing “Author from Scratch”.
Step 4: Fill up the basic information.
We can give our own function name. We can select a runtime in which we will write our function code. Currently, lambda functions can be written on different runtimes like Node.js, Python, Ruby, and so on.
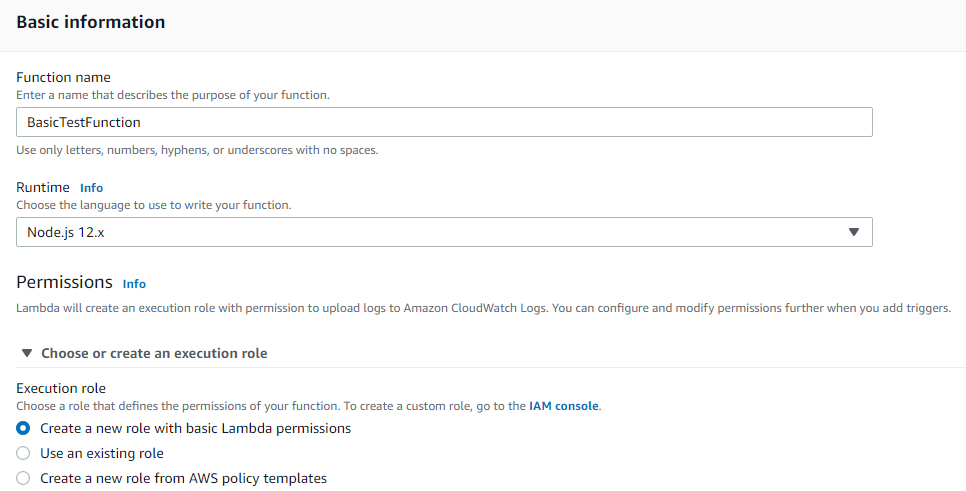
Note: We can create a new role with basic permissions for now but if our function code needs access to other AWS services, we need to create a new role with the particular service permission. And we have to choose the role in this step from the option “Use an existing role”.
Step 5: Finally create a function
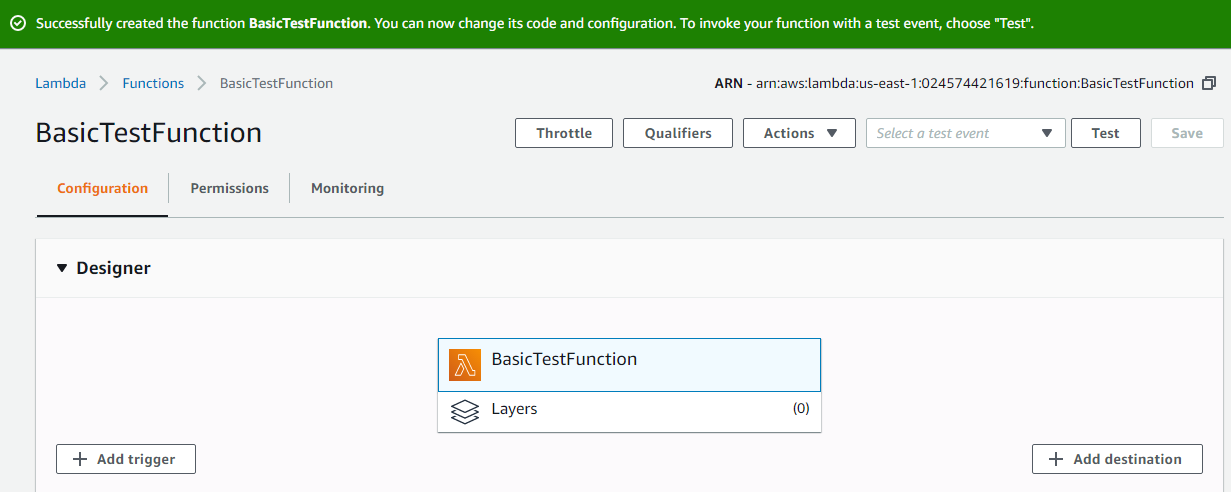
Step 6: Go to your function dashboard.
In this screen, you can see three tabs at the top:
- Configuration
- Permission
- Monitoring
Configuration tab allows us to add triggers, edit or upload the function code, set environment variables, and so on.
Permission tab allows us to add different permissions to our lambda function. For example: If our function code writes data to DB, then we must provide the DB to write access to our function.
Monitoring tabs allow us to monitor our function status. For example the number of invocations, duration of function execution, maximum expensive execution, and so on.
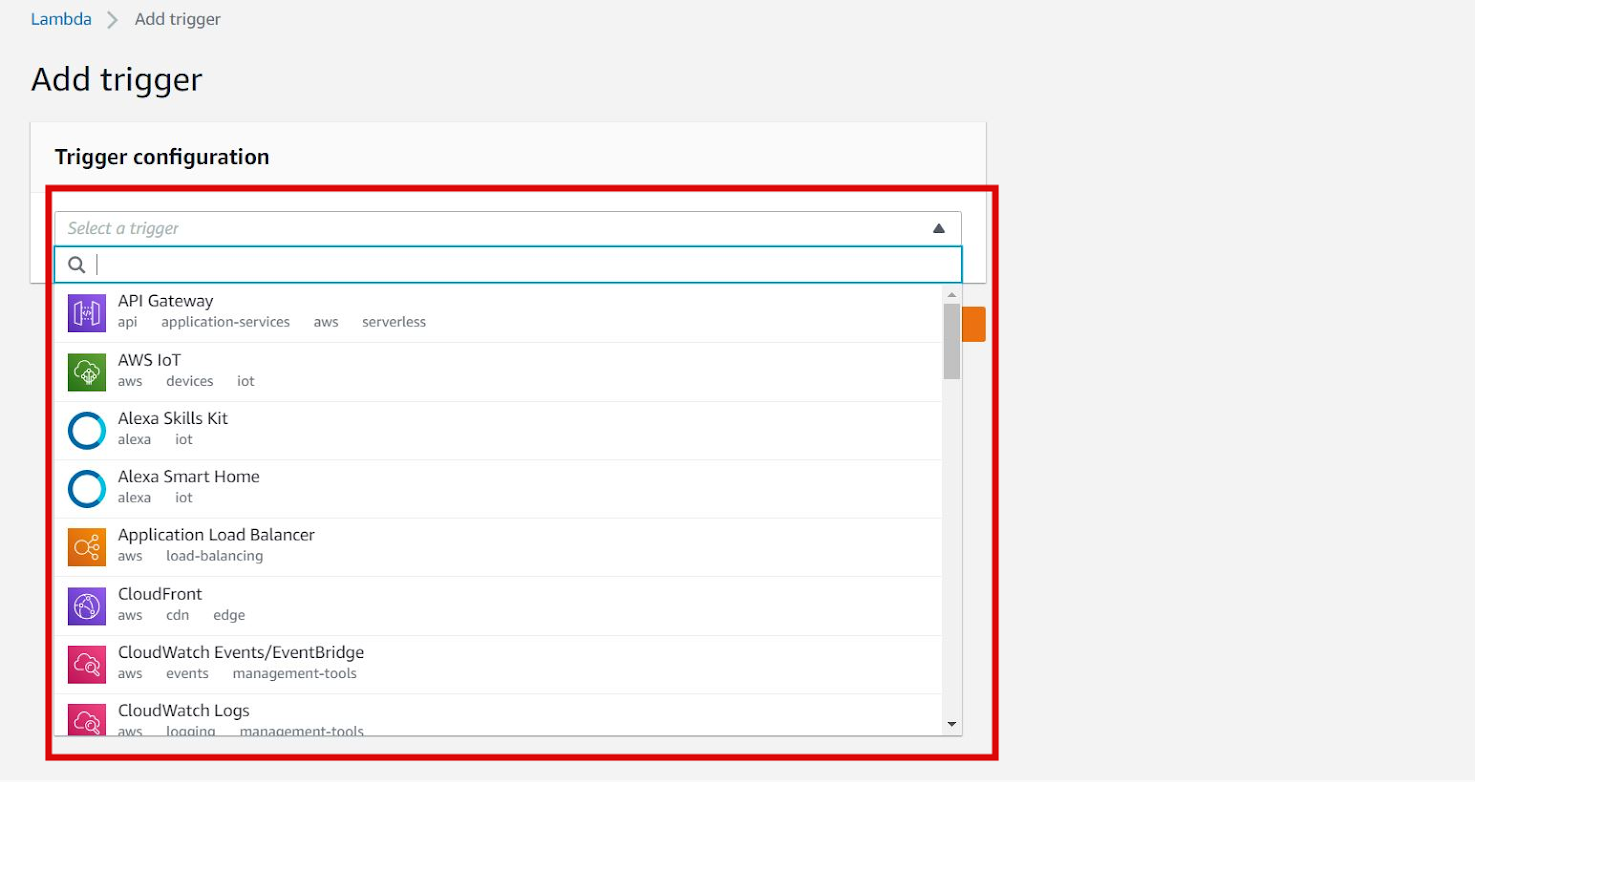
Step 7: Add Trigger
We can add different triggering options to the lambda function. For example, We may trigger the function when objects are uploaded to S3, we also may trigger the function on API endpoints. For this, we can select different triggering services from the “Add trigger” option.
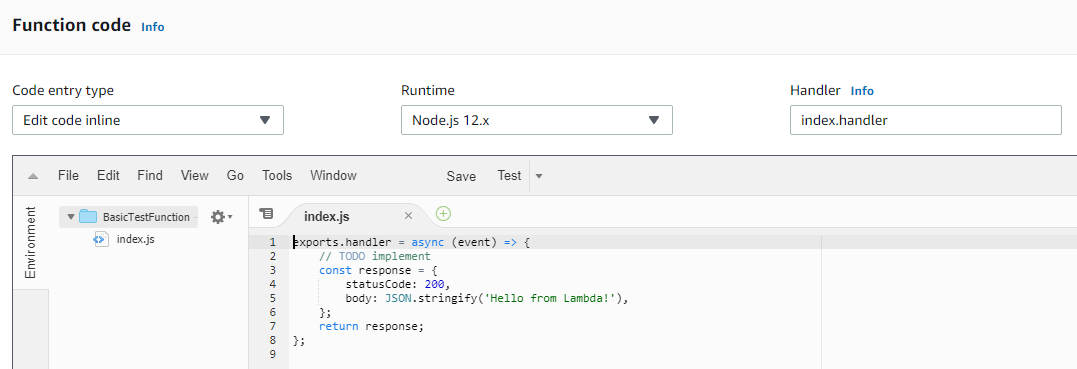
Step8: Uploading/Creating the Function Code
This is the main function code. Lambda dashboard provides an inline editor to write code from scratch. We can choose different runtimes like Node.js, python and many more. Also, also can zip our code and upload it directly from the option “Code entry type”.
We can write the function code inside the index.js file if we choose an option “Edit code inline”. The function code inside the handler block is similar to the normal javascript function and we can modify as per our need.
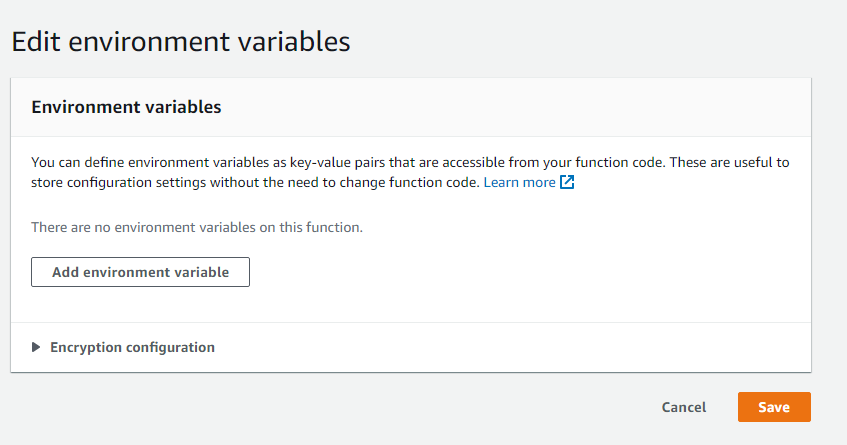
Step 9: Add Environment variables
We can add different environment variables through this screen. We can set DB variables, AccessID, Secret key as environment variables as per our use.
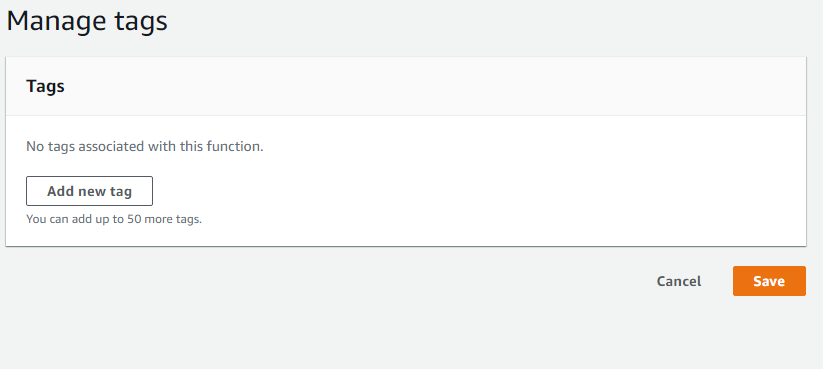
Step 10: Add Tags
A tag is a label that you assign to an AWS resource. Each tag consists of a key and an optional value. You can use tags to search and filter your resources or track your AWS costs.
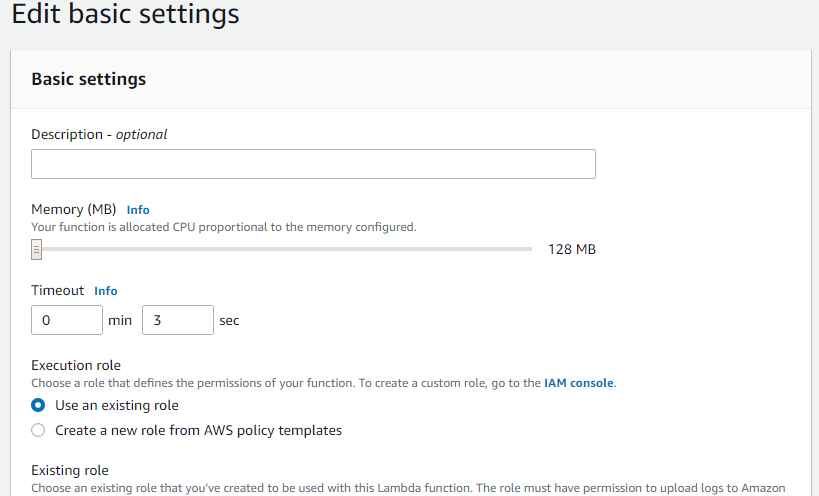
Step 11: Editing of Basic Environment Settings
The complexity level of our function depends upon our use case. In case if our function is CPU incentive or needs large memory we can adjust memory setting and estimated time of execution from this screen.
Memory settings can be adjusted through the slider.
Note: Pricing of the Lambda function is done in the nearest 100ms. For example: If our function code runs for 108ms we should pay the cost of 200ms. So, shorter execution time, cheaper is the pricing.
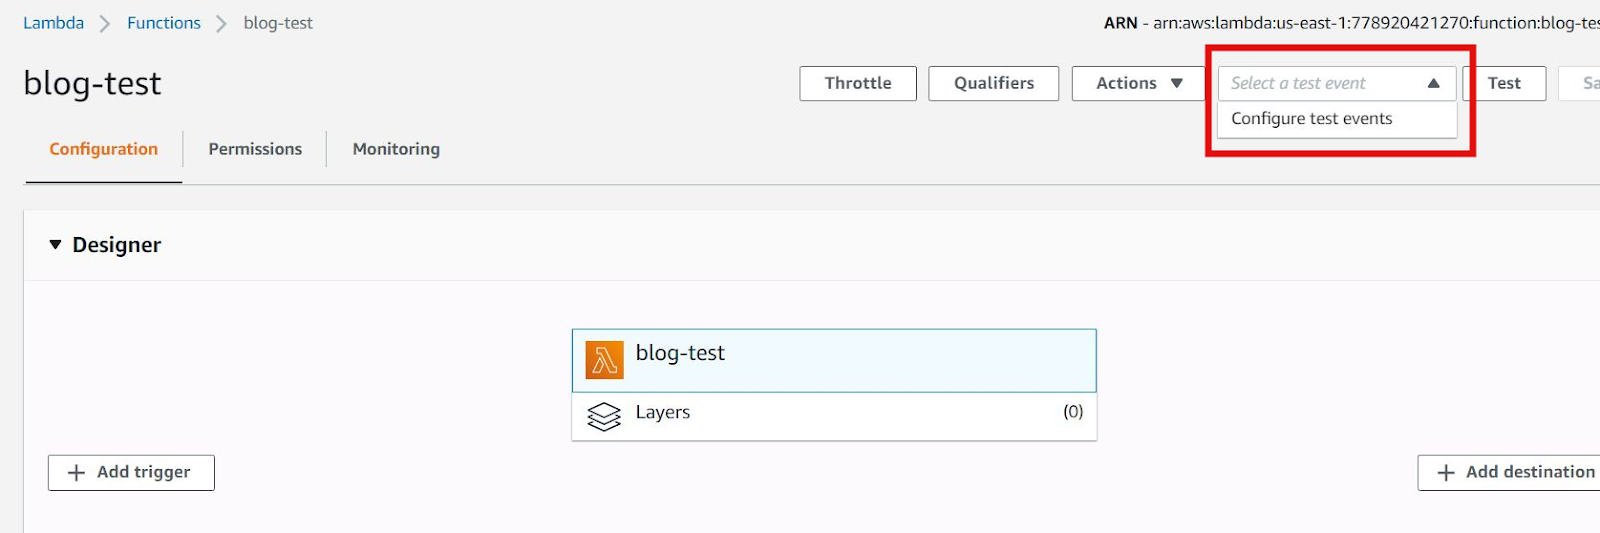
Step 12: Creating a test function.
We also can execute our function through test events. We can simulate different event triggers by creating test events. For this, we can simply choose the “Configure test events” option.
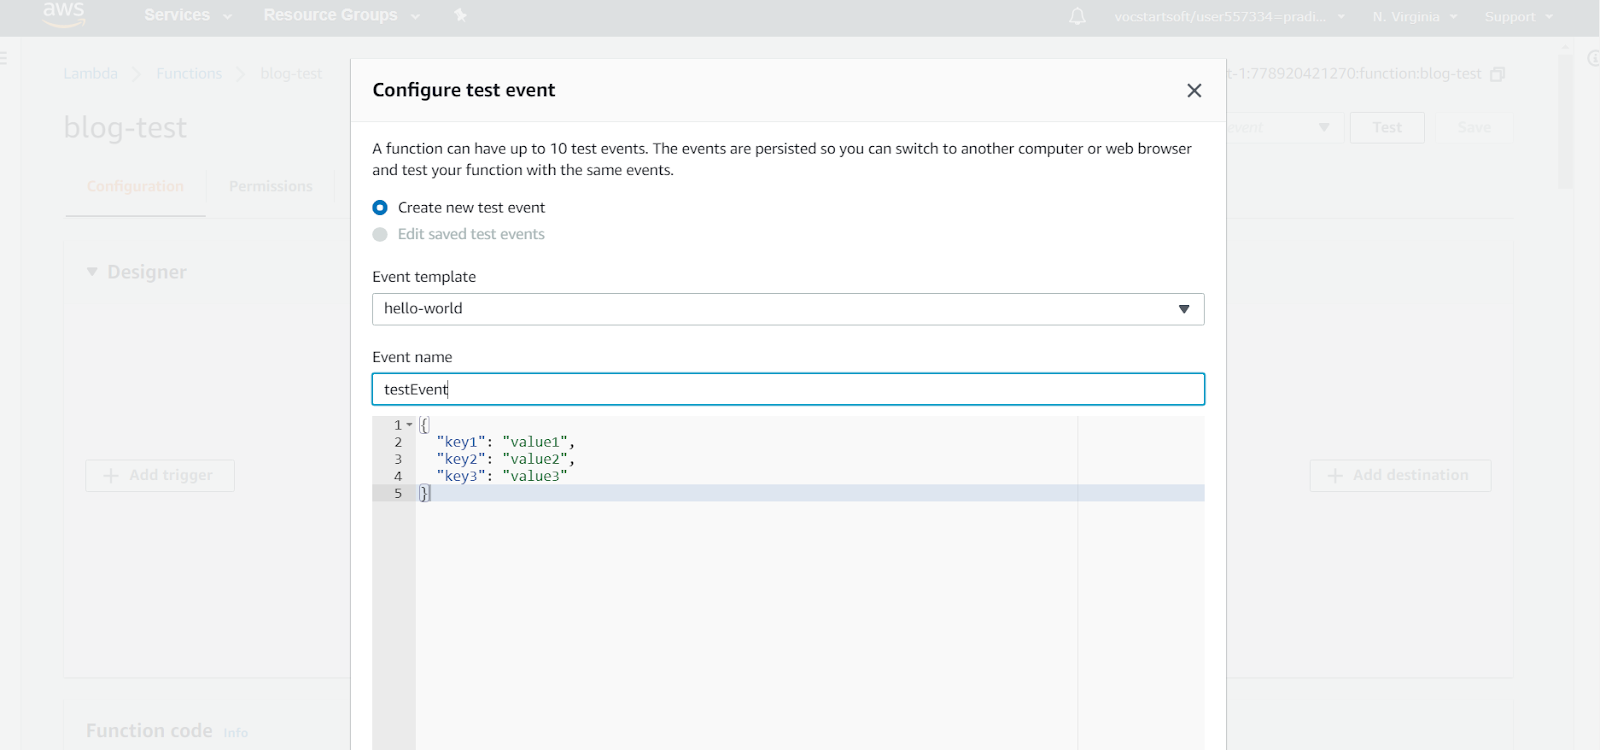
Note: We also can create other advanced triggering events using event templates.
For example, We can use S3 PUT event templates to simulate an event which is called when an object is created in any S3 objects.
We can provide a test event name and different test inputs to the lambda function as keys/values to JSON objects and click on the “Create” button.
Step 13: Testing the lambda function.
Upon successful creation of the test event, we can execute our lambda function by simply clicking on the Test button as shown below.
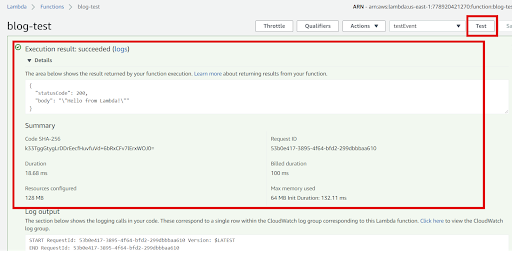
And we also can view the execution results of our lambda function. Along with the function logs/outputs, we also get different function meta information like time consumed for execution, memory consumption and many more. With such information, we can adjust our environment parameters for function optimization.
All in all, the session was a fruitful one with the attending officials showing great interest in implementing the ideas to develop and retain talents in our country Nepal. In a nutshell, the webinar was a complete success as the response from the event was overwhelming with enthusiastic participants enrolled and was able to attract the attendees of varied career levels and was commended as fruitful by most of the attendees. Lastly, one major thing that makes the webinar more exciting and fruitful was participants were very interactive and the intercommunication between the participants and the facilitators was very smooth and effective which resulted in a great impact on learning for all the attendees.
Video (Getting Started with AWS Lambda using Node JS)
Medium Posts
