 International
 Finland
 Bangladesh
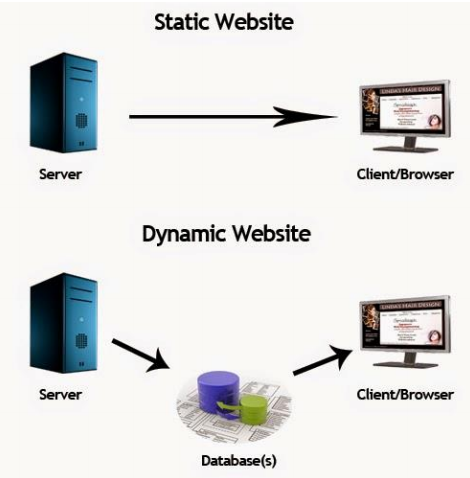
On 12th April 2020, Sunday, a virtual webinar and a demo session on Launching an EC2 instance from a custom Amazon Machine Image (AMI) were hosted by Genese.
An EC2 instance is a virtual server in Amazon’s Elastic Compute Cloud (EC2) for running applications on the Amazon Web Services (AWS) infrastructure. AWS is a comprehensive, evolving cloud computing platform; EC2 is a service that allows business subscribers to run application programs in the computing environment.
One of the main advantages of the EC2 is its Elastic Load Balancing which automatically distributes incoming application traffic across multiple instances, and with this feature, EC2 can find unhealthy instances and seamlessly reroute traffic to healthy instances until the unhealthy ones are restored.
Moreover, the session covered the following steps to launch an EC2 instance from a custom Amazon Machine Image (AMI):
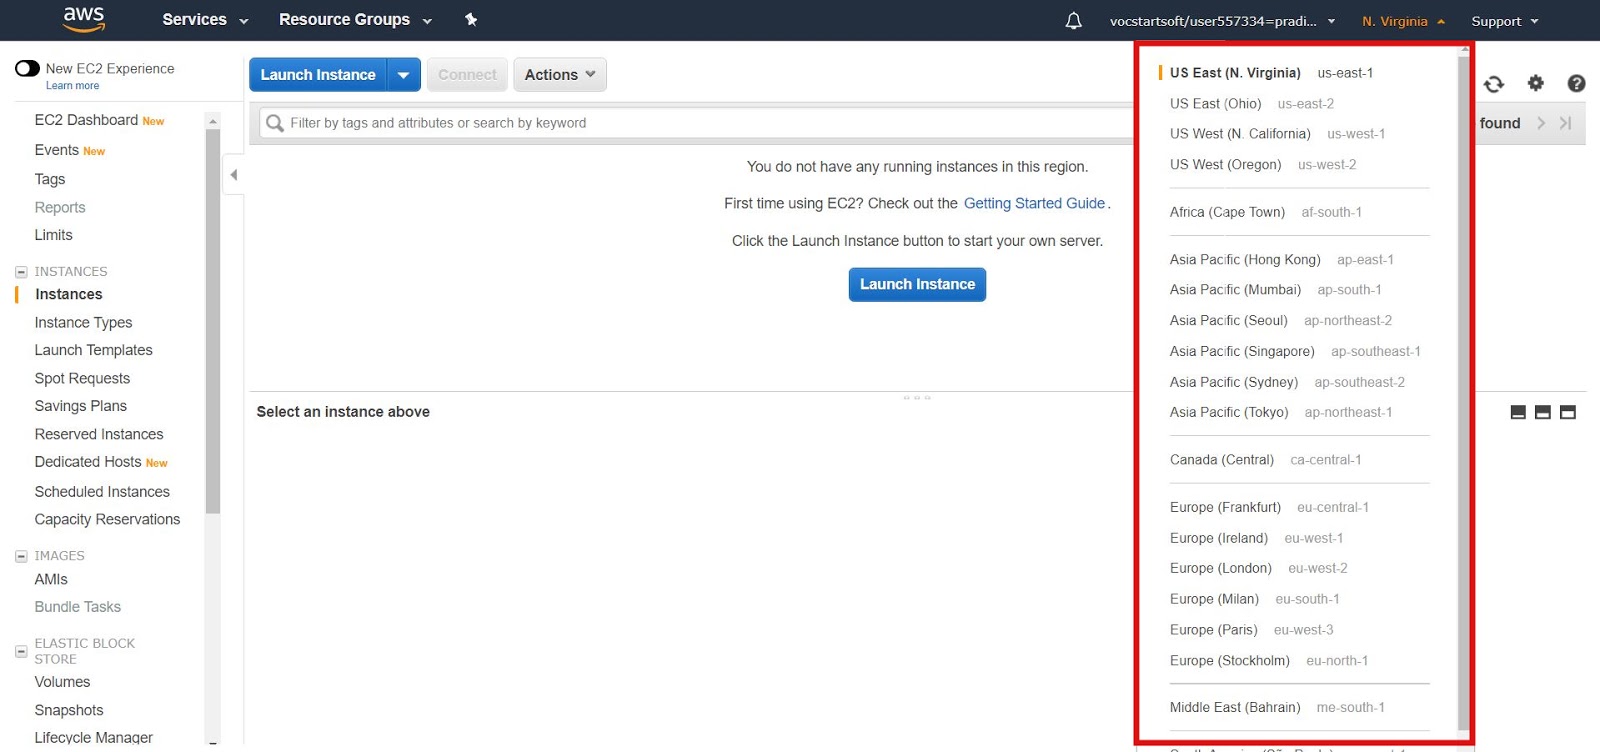
Firstly, Open the EC2 console.
Note: Be sure to select the AWS region you want to launch the instance in.
1) From the navigation bar, choose AMIs.
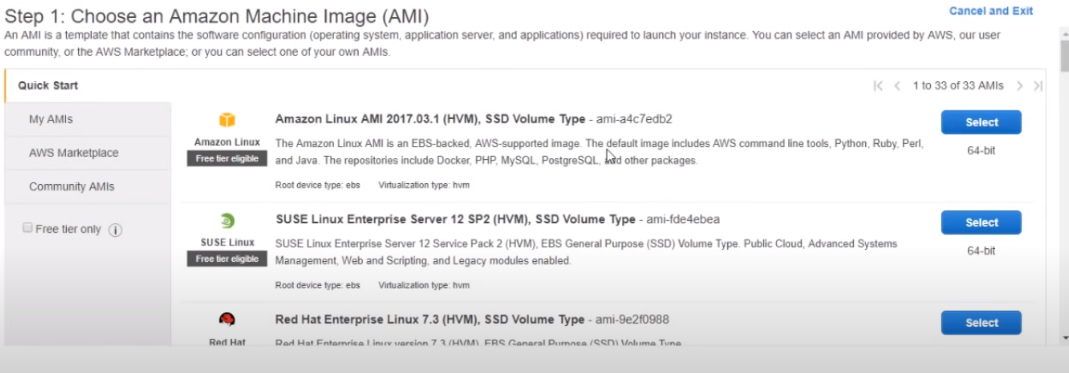
An AMI is a template that contains the software configuration (operating system, application server, and applications) required to launch your instance. You can select an AMI provided by AWS, our user community, or the AWS Marketplace; or you can select one of your own AMIs.
To begin, open the menu next to the search bar, and then choose one of the following:
- If the AMI you’re using is one that you created, select Owned by me.
- If the AMI you’re using is a public AMI, select Public images.
- If the AMI you’re using is a private image that someone else shared with you, select Private images.
Note: The search bar automatically provides filtering options, as well as automatically matching AMI IDs.
2) Choose an instance type, and then choose Next: Configure Instance Details.
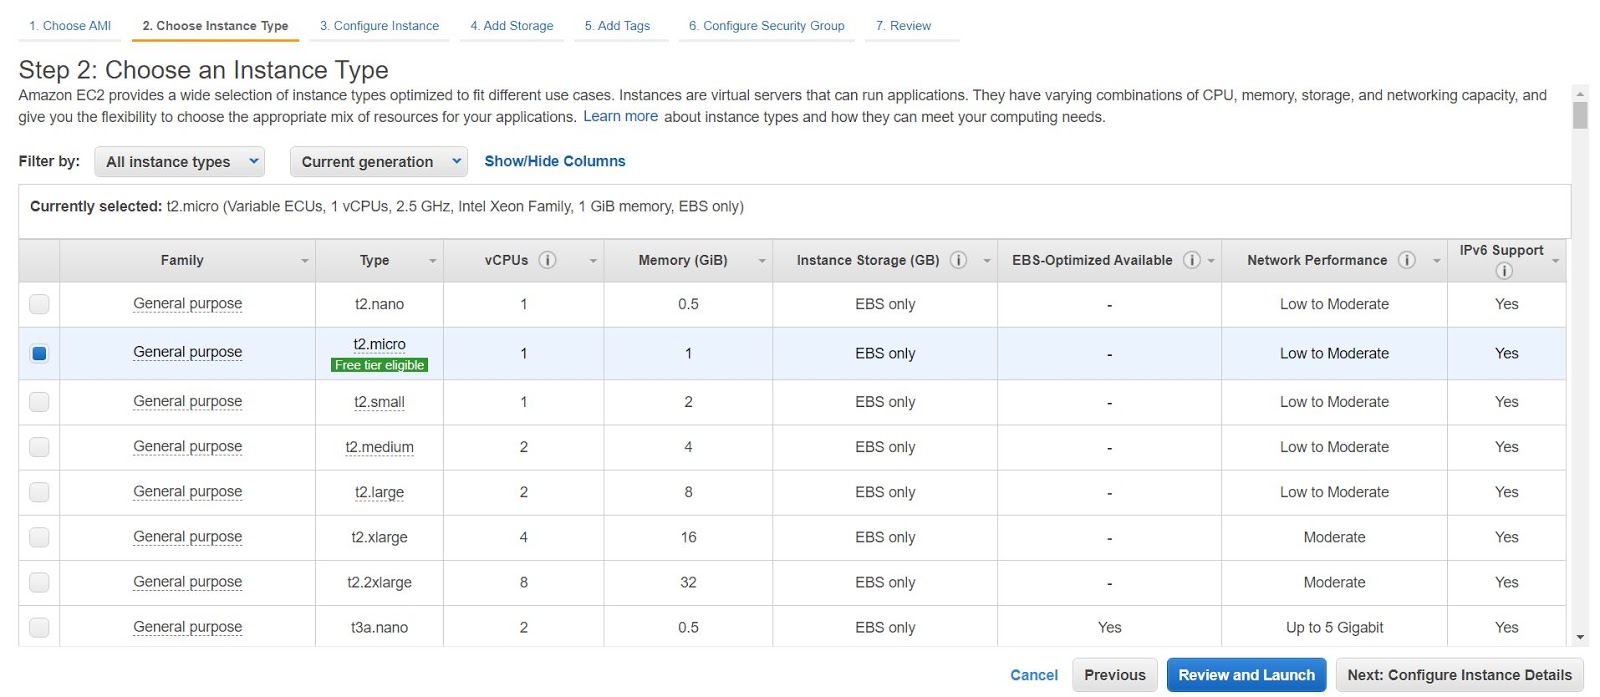
Amazon EC2 provides a wide selection of instance types optimized to fit different use cases. Instances are virtual servers that can run applications. They have varying combinations of CPU, memory, storage, and networking capacity, and give you the flexibility to choose the appropriate mix of resources for your applications.
3)Review the Instance Details, and then choose Review and Launch.
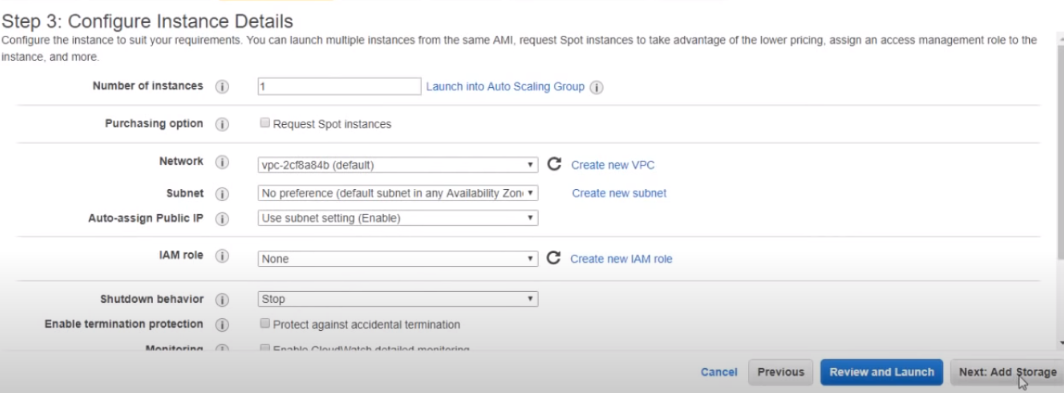
Select an existing key pair or create a new key pair, select the acknowledge agreement box, and then choose Launch Instances.
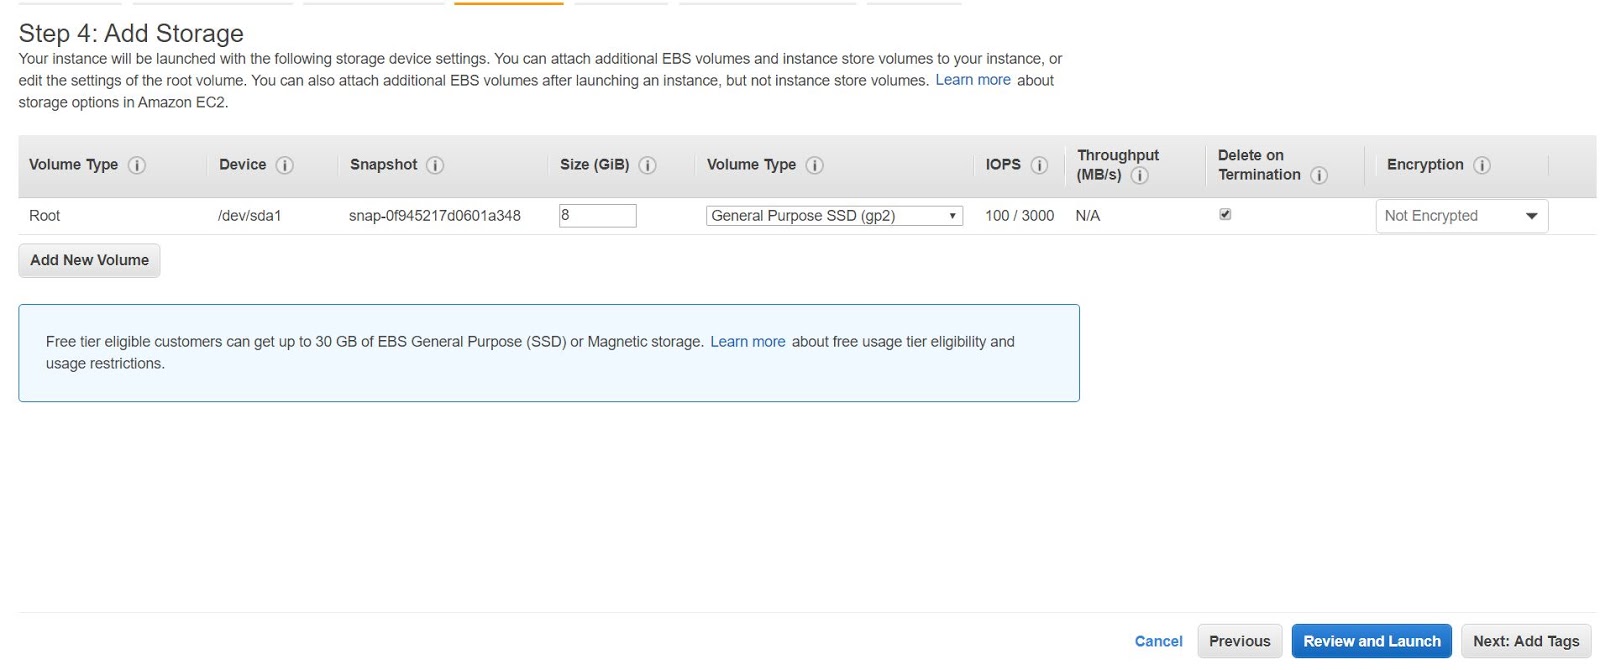
4)Add storage, choose Next, and then choose Launch.
5) Add tags
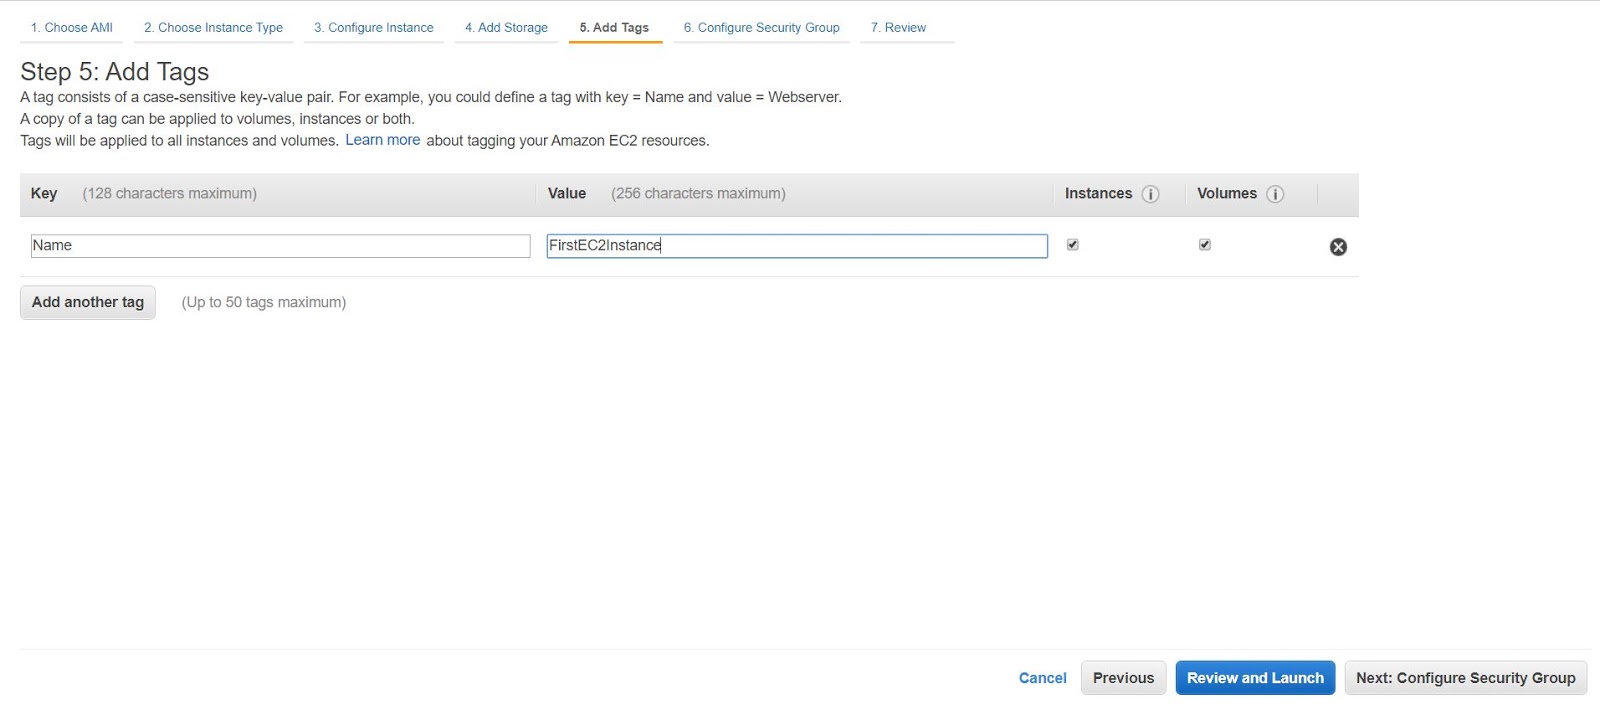
Each tag is a label consisting of a user-defined key and value. Tags can help you manage, identify, organize, search for, and filter resources. Users can create tags to categorize resources by purpose, owner, environment, or other criteria.
6)Configure Security Group
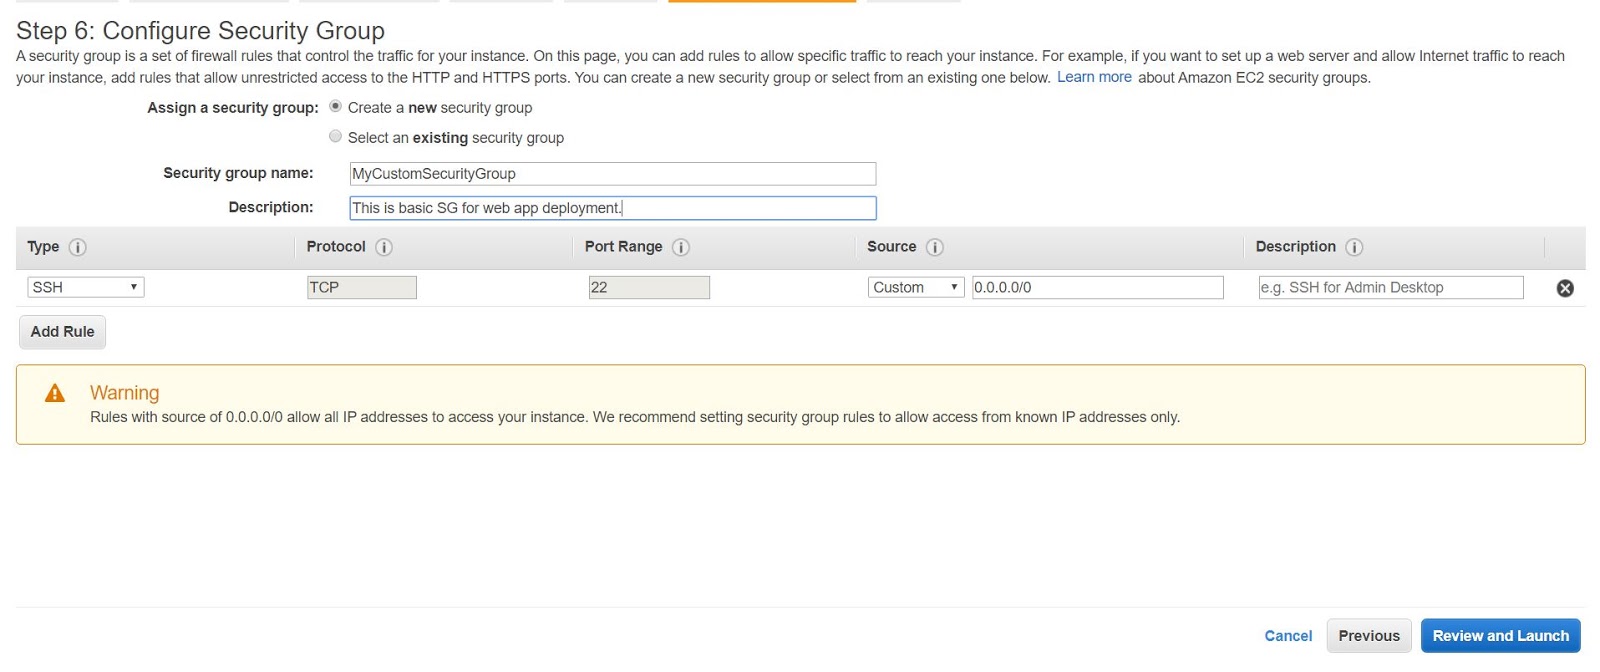
A security group acts as a virtual firewall for users’ instances to control inbound and outbound traffic. If the user launches an instance using the Amazon EC2 API or a command-line tool and doesn’t specify a security group, the instance is automatically assigned to the default security group for the VPC.
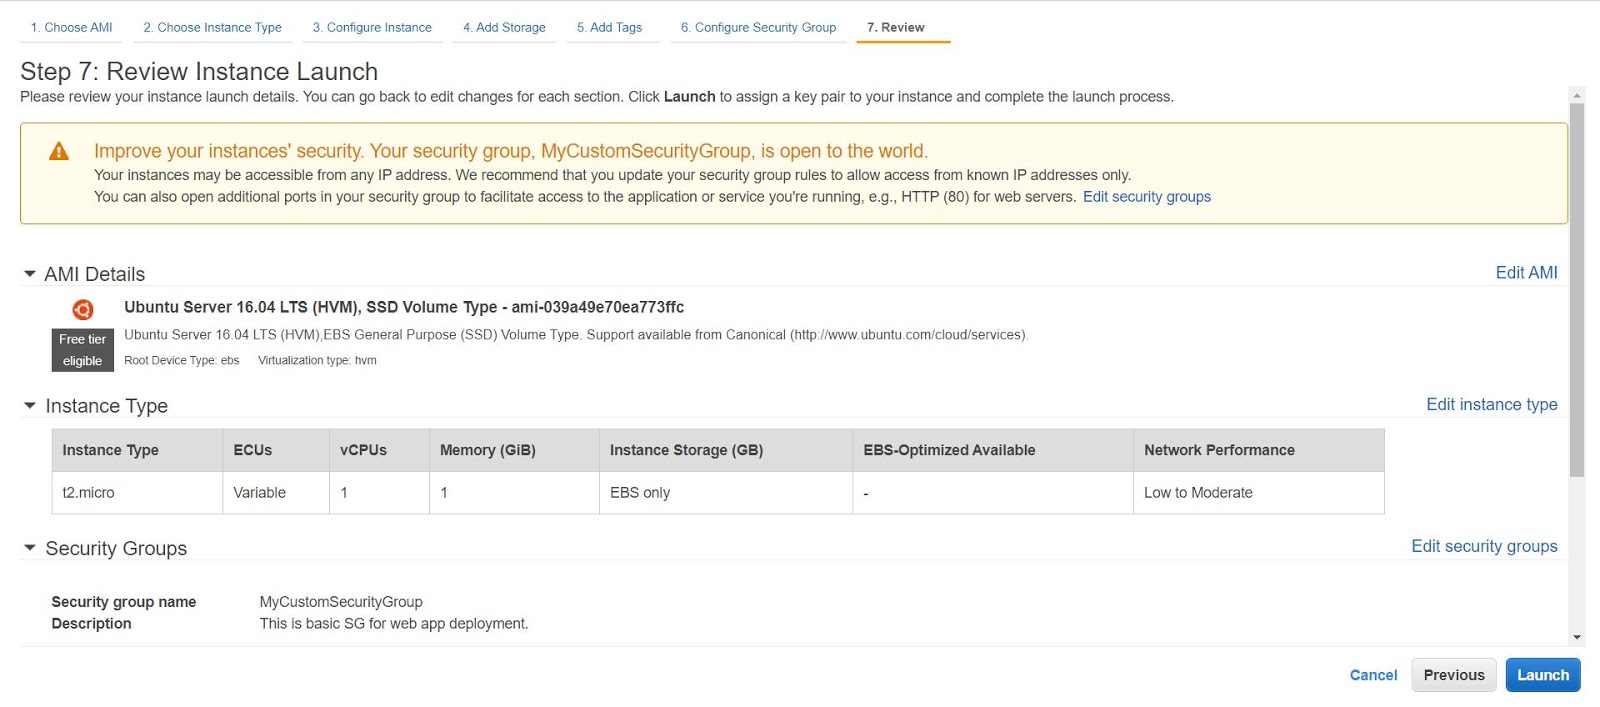
7)Review instance launch
Review all the configurations and click on the Launch button.
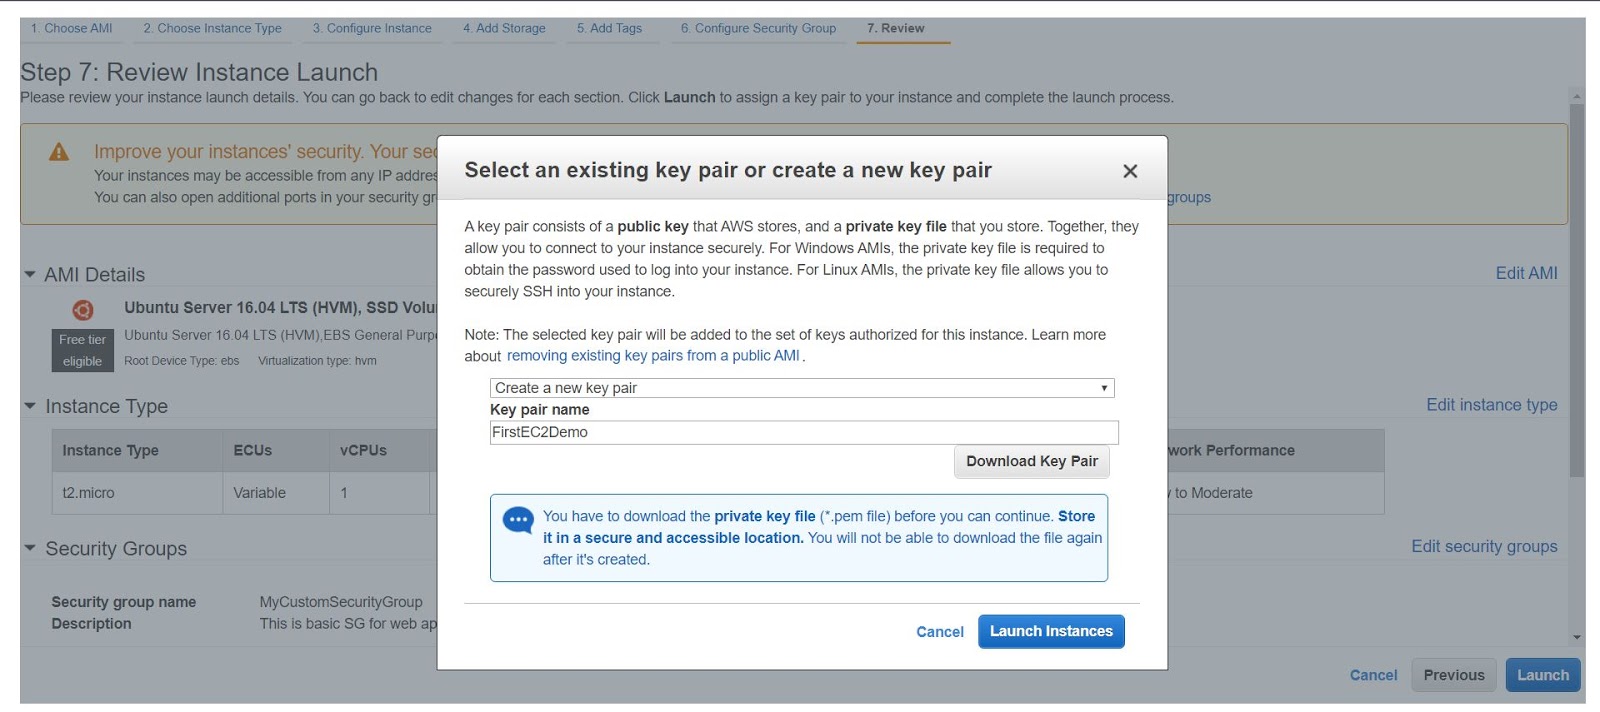
8)Generate a key pair.
A key pair consists of a public key that AWS stores, and a private key file that you store. Together, they allow you to connect to your instance securely. For Windows AMIs, the private file is required to obtain the password used to log into your instance. For Linux AMIs, the private key file allows you to secure SSH into your instance.
In a nutshell, the webinar was a complete success as the response from the event was overwhelming with over 100 participants enrolled and was able to attract the attendees of varied career levels and was commended as fruitful by most of the attendees.
Video (Creating an EC2 instance)
Medium Posts
