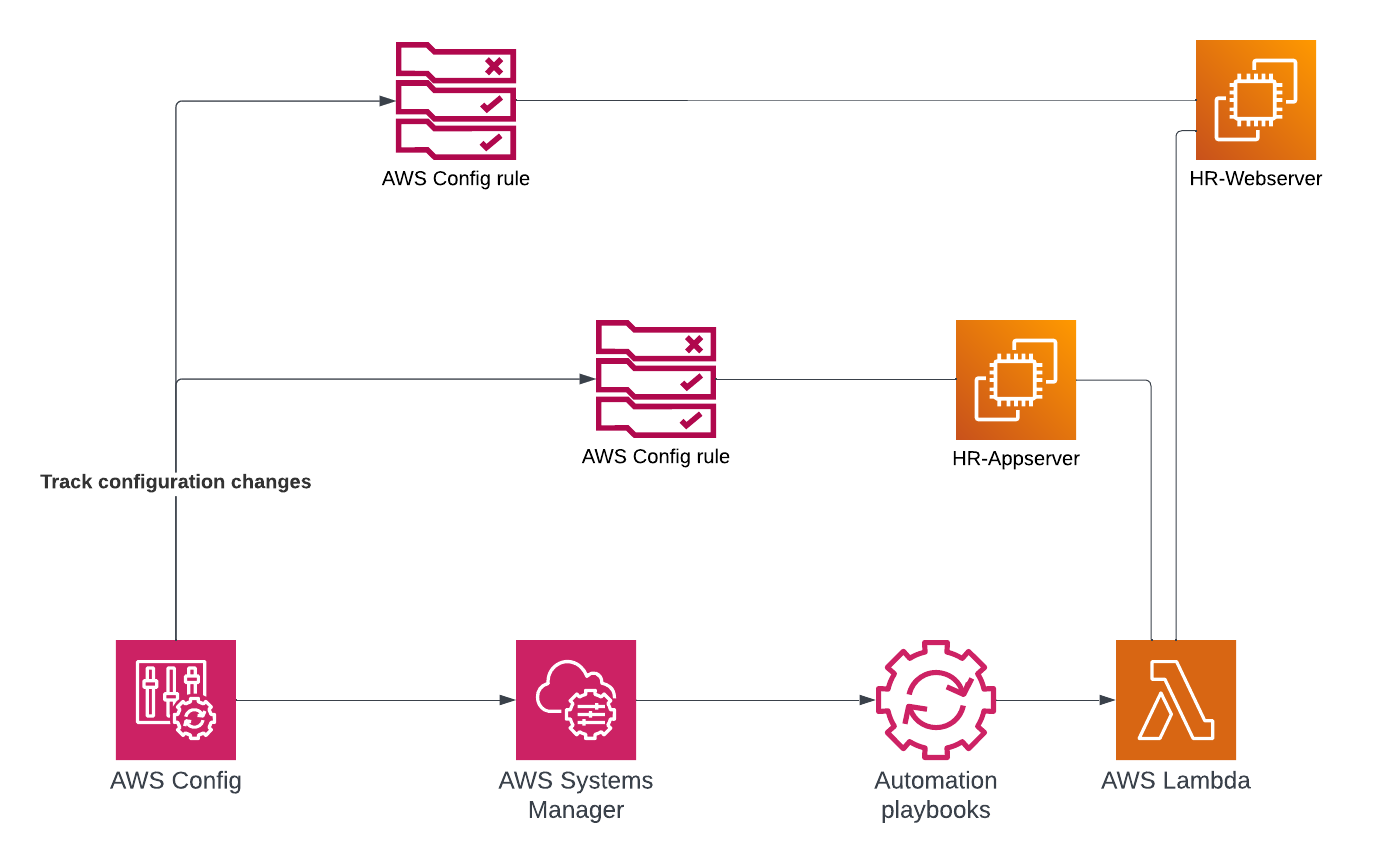
AWS Config provides capabilities for reviewing, auditing, and analyzing the configurations of your AWS resources. AWS Config rules are activated whenever changes occur in your AWS environment. By continuously monitoring these changes, you can promptly detect compliance issues and mitigate risks for your organization. Additionally, when remedial actions are taken for AWS Config rule violations, automation is triggered immediately upon detection of the violation. In this blog post, I will detail how you can leverage AWS Config rules to prohibit the exposure of publicly accessible SSH ports in your network.
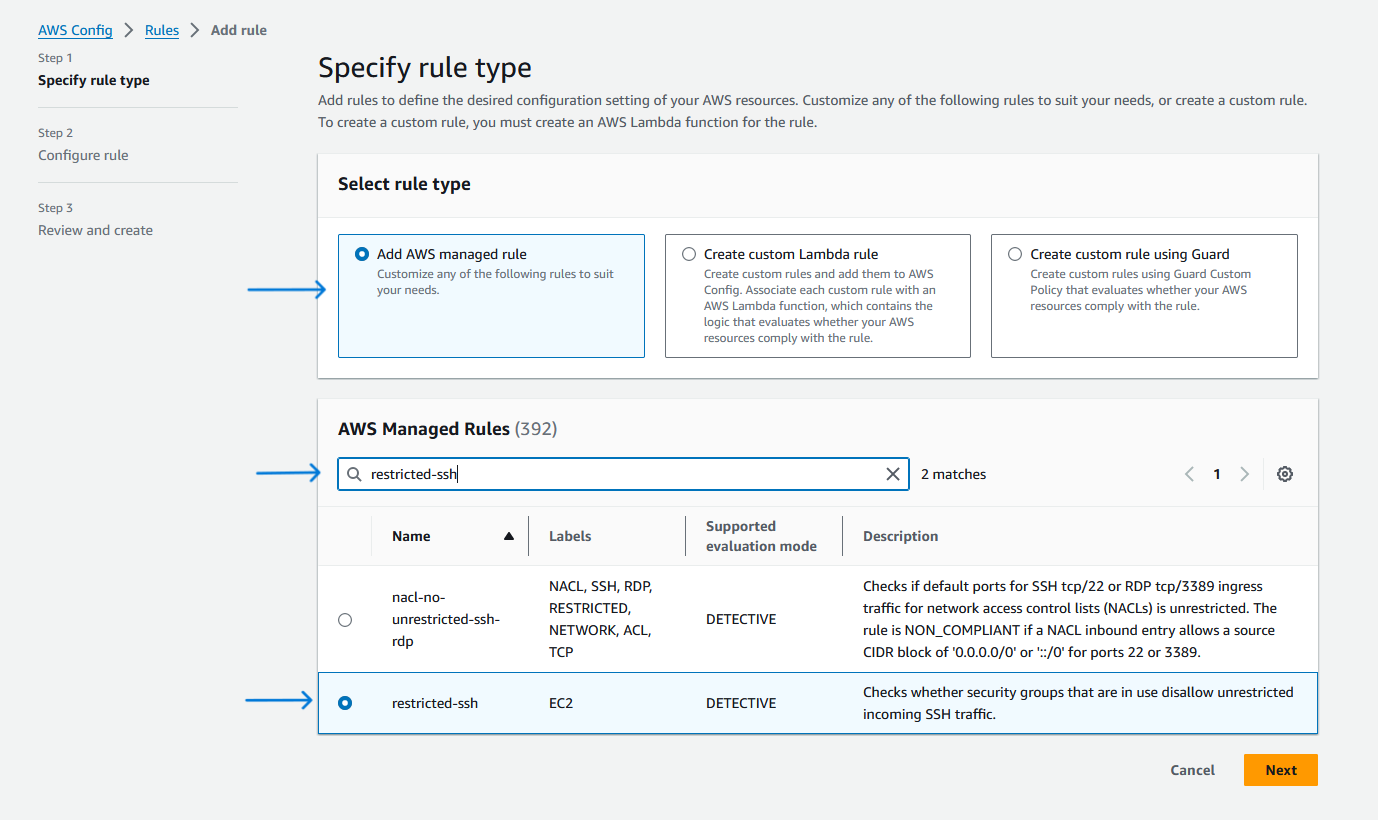
To identify open SSH ports, set up and customize an AWS Config rule:
- Navigate to the AWS Config console’s left-hand menu, select “Rules”, and click on “Add rule”.
- Under “Specify rule type”, opt for “Add AWS managed rule”.
- Within the “AWS Managed Rules” section, search for and select “restricted-ssh”, then proceed by clicking “Next”.
4. In the “Configure rule” section, stick with the default settings, then proceed by selecting “Next”.
To test the rule, create a security group allowing SSH access from anywhere:
- In the EC2 console’s left-hand navigation pane, click on “Security Groups”, then select “Create Security Group”.
- Fill in the necessary details on the “Create Security Group” page:
-
- Enter “PublicSSH” as the security group name.
- Under “Inbound rules”, click on “Add Rule”. Set the “Type” to SSH and the “Source” to “Anywhere”.
-
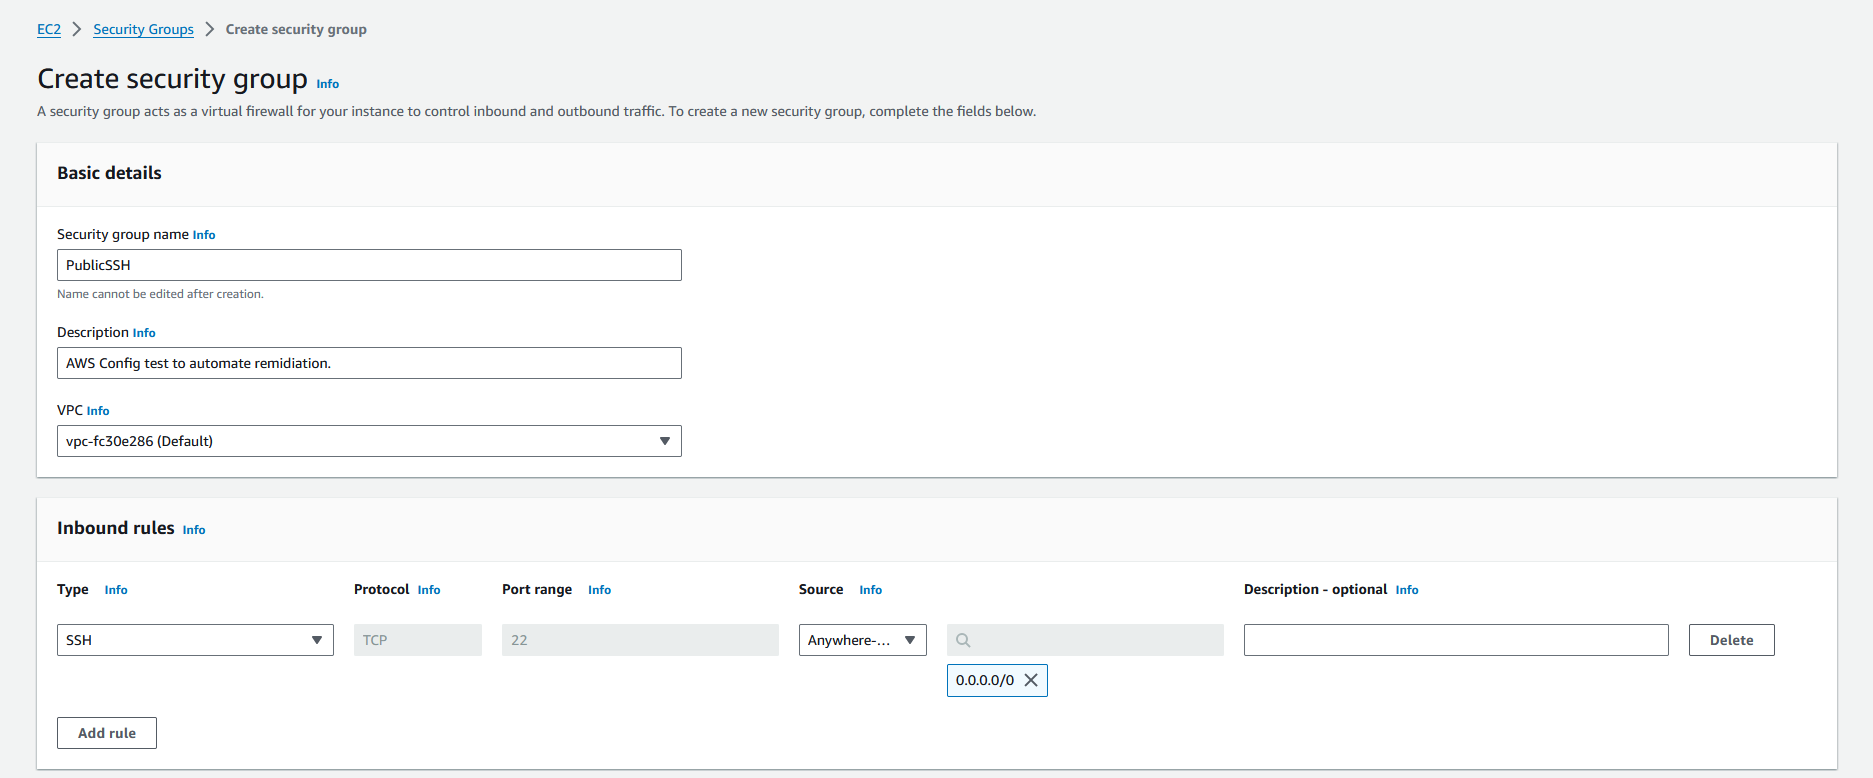
3. Once the security group is created, take note of its security group ID for future reference.
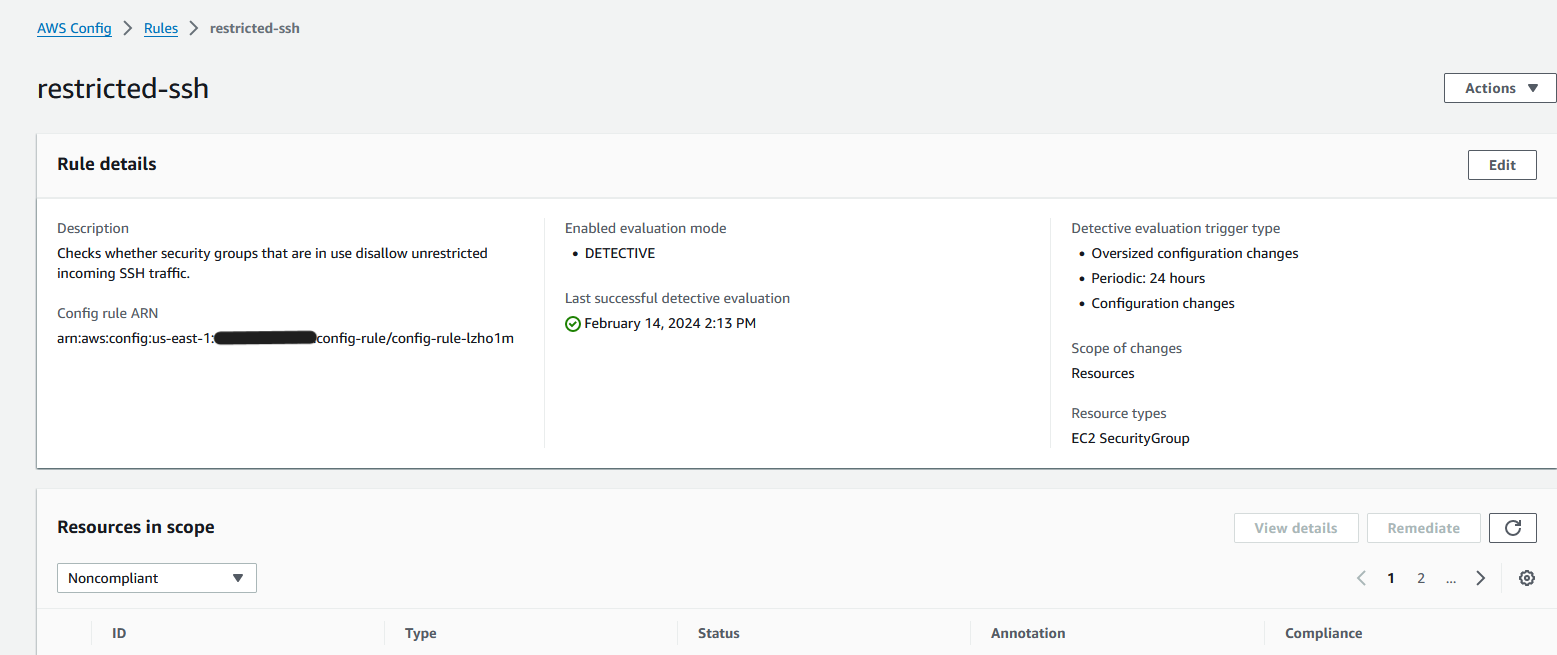
After a few minutes, revisit the AWS Config console to observe the security group’s non-compliance status.
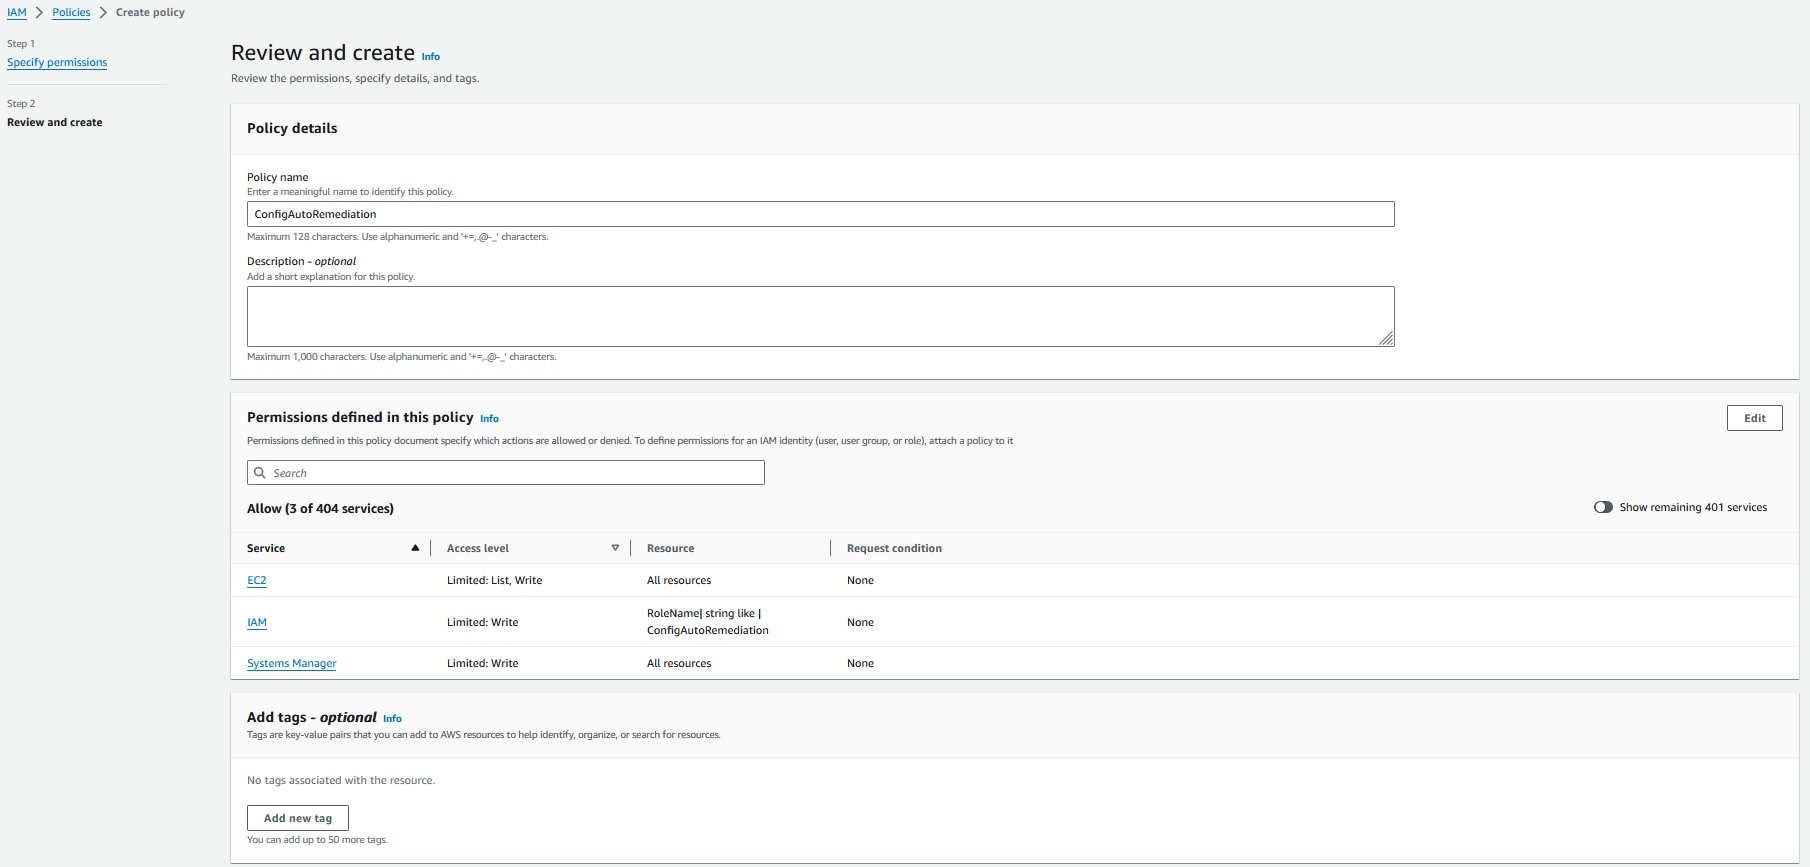
Now, we’ll employ automation to address the issue. First, create an IAM policy and role dedicated to the remediation process. The policy provided includes all essential capabilities and permissions required for the tasks described in this blog post.
- Go to the Policies section in the IAM console’s left-hand menu and select “Create policy”.
- Switch to the JSON tab and insert the provided policy. Make sure to substitute “1111111111111” with your AWS account ID.
{
“Version”: “2012-10-17”,
“Statement”: [
{
“Sid”: “ChangeAutomation1”,
“Effect”: “Allow”,
“Action”: [
“ec2:RevokeSecurityGroupIngress”,
“ssm:StartChangeRequestExecution”,
“ec2:StopInstances”,
“ec2:DescribeInstanceStatus”
],
“Resource”: “*”
},
{
“Sid”: “ChangeAutomation2”,
“Effect”: “Allow”,
“Action”: “iam:PassRole”,
“Resource”: “arn:aws:iam::1111111111111:role/ConfigAutoRemediation”
}
]
}
3. For the policy name, enter “ConfigAutoRemediation”, and then choose Create policy.
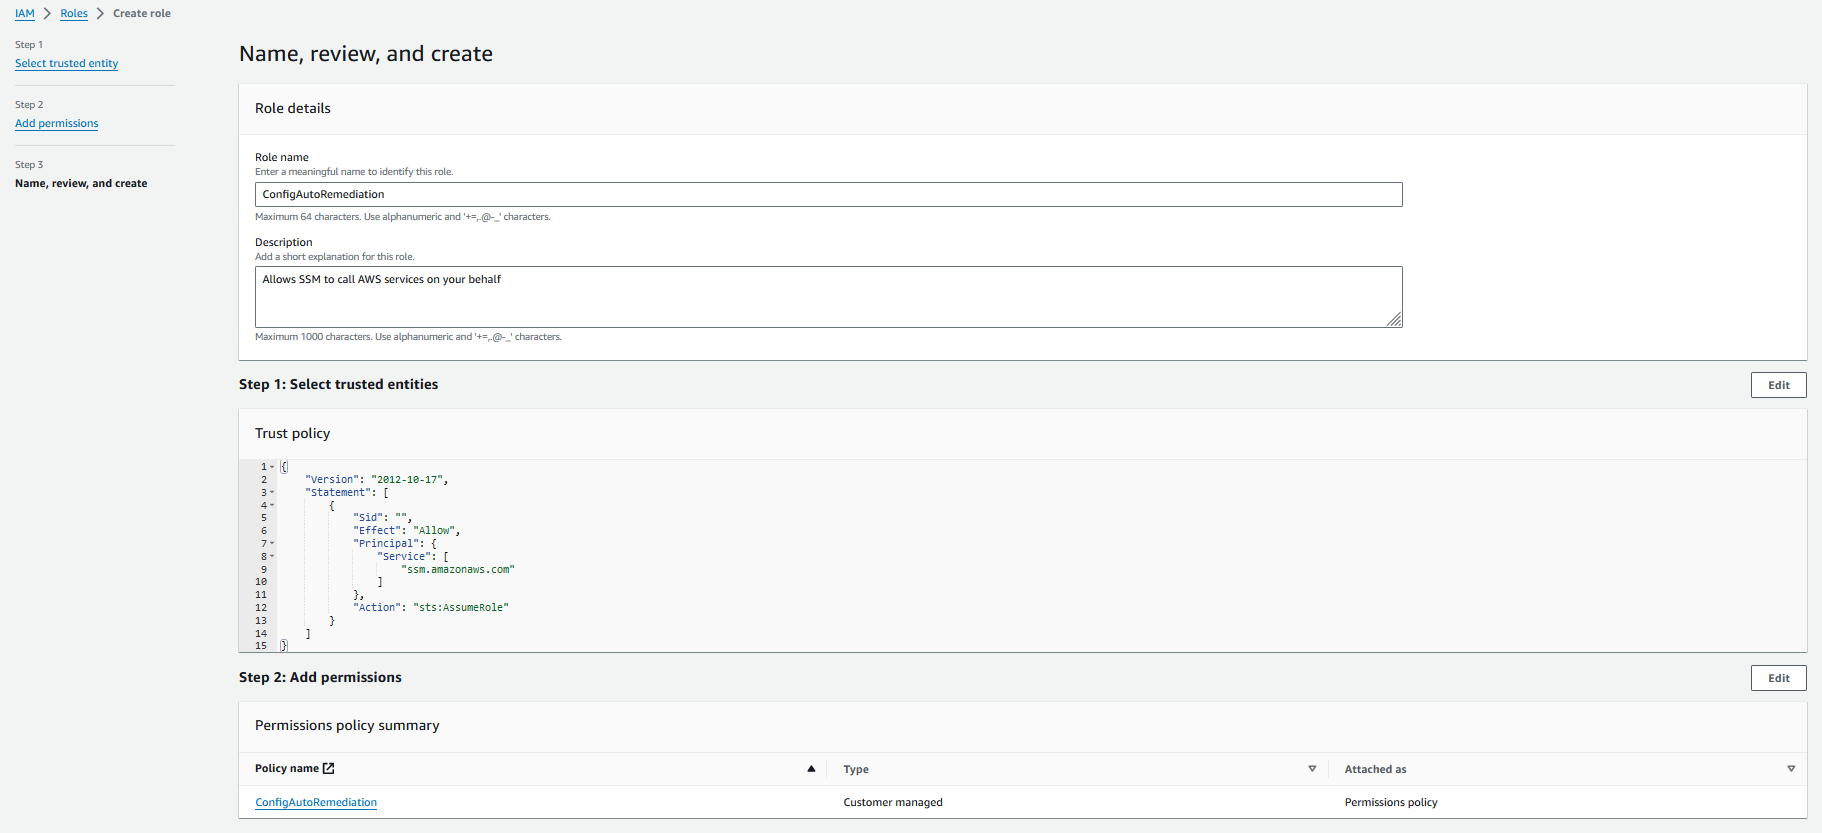
- Navigate to the Roles section in the left-hand menu and click on “Create role”.
- Select “AWS service” as the type of trusted entity, then choose “Systems Manager” from the list.
- Under “Select your use case”, opt for “Systems Manager”.
- Proceed by selecting “Next: Permissions”.
- Look for “ConfigAutoRemediation” and tick the checkbox next to it.
- Enter “ConfigAutoRemediation” as the role name, then click on “Create role”.
To initiate the process of disabling the security group through Systems Manager Automation, follow these steps:
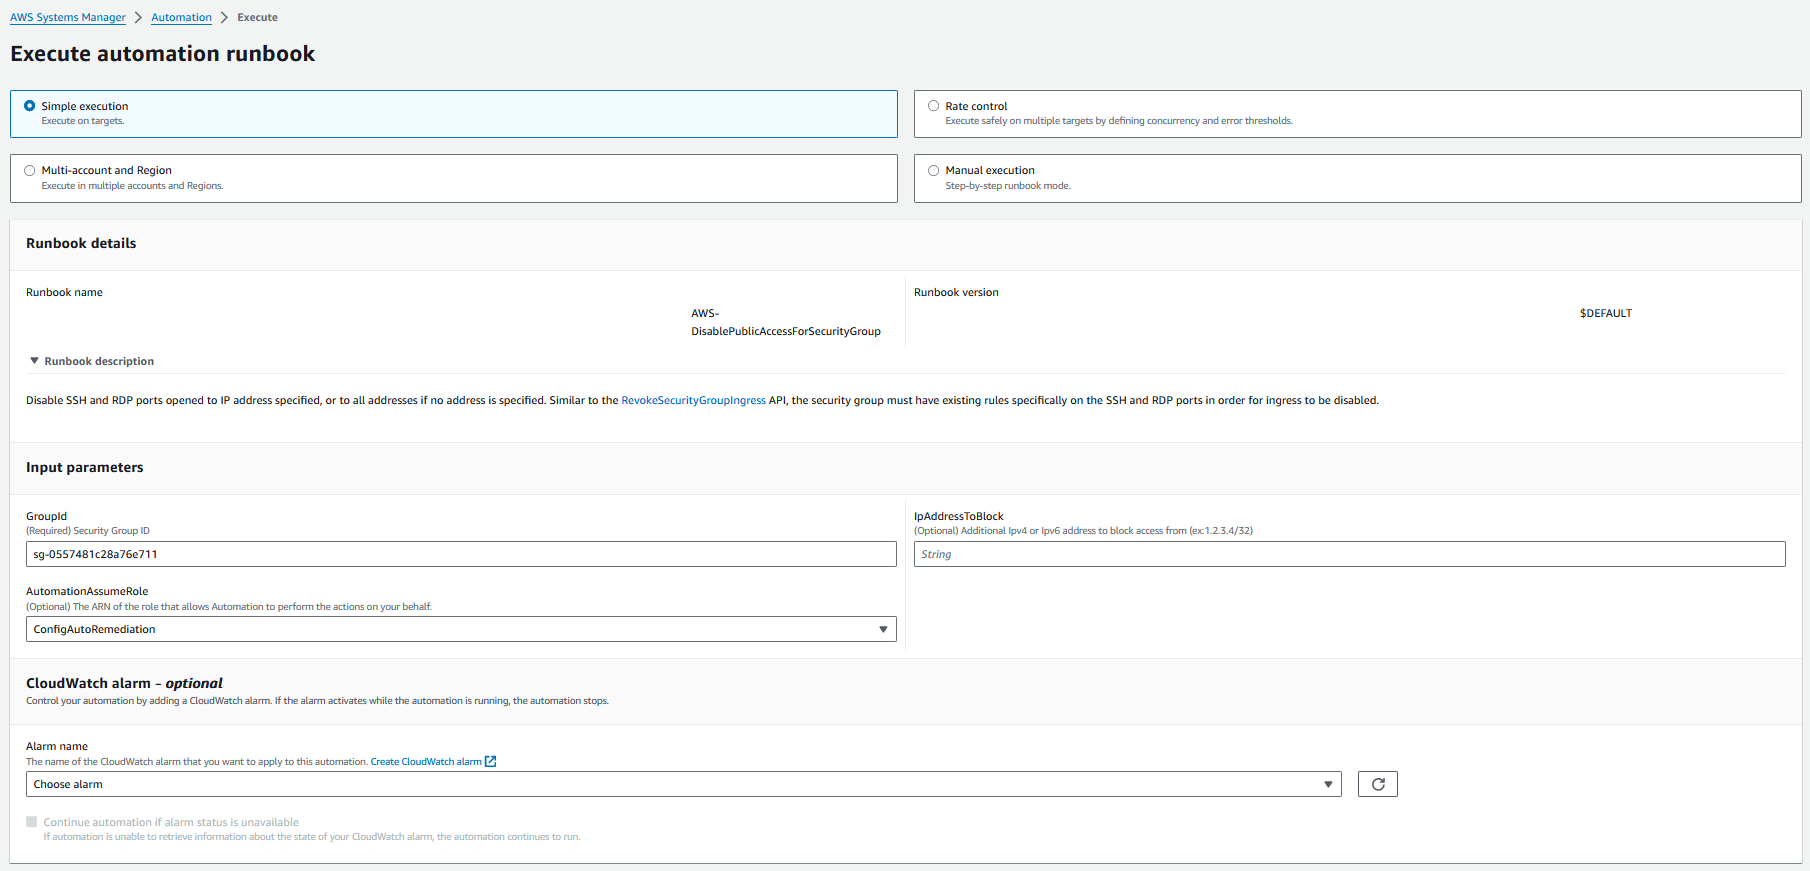
- Navigate to the Systems Manager console’s left-hand menu and select “Automation”, then click on “Execute Automation”.
- Search for and select the “AWS-DisablePublicAccessForSecurityGroup” document, and proceed by clicking “Next”.
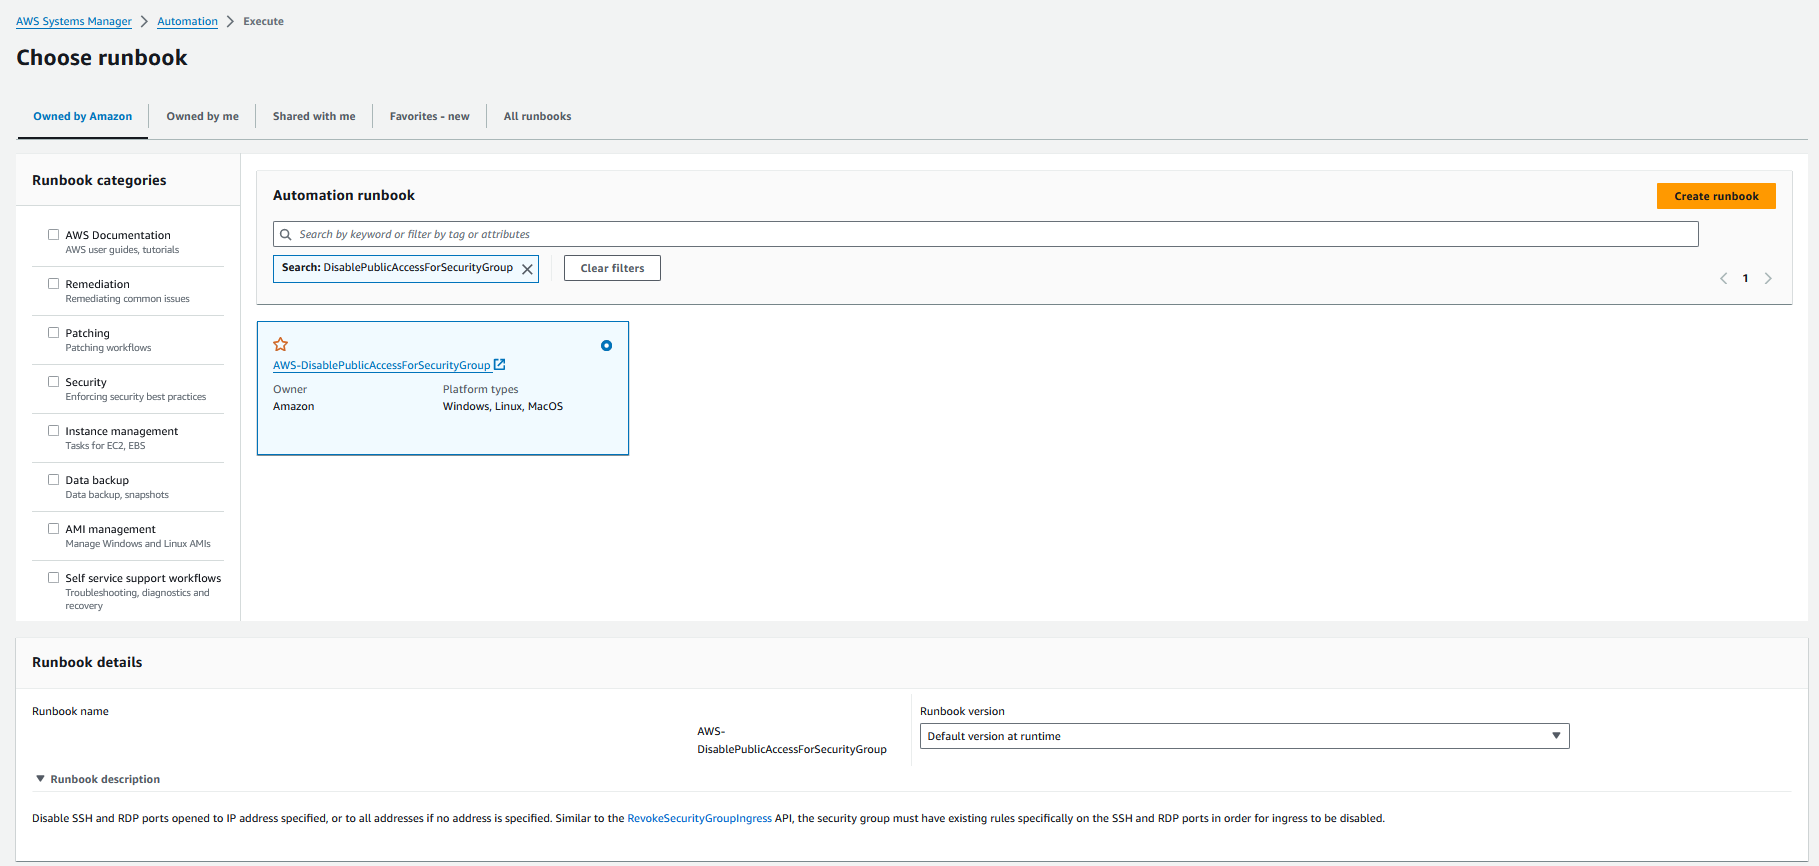
3. Choose “Simple execution” for the type of execution.
4. Input the security group ID, select “ConfigAutoRemediation” for AutomationAssumeRole, and then click “Execute”.
5. To confirm the automation’s outcome, return to the EC2 console and verify that the security group no longer permits public SSH access.

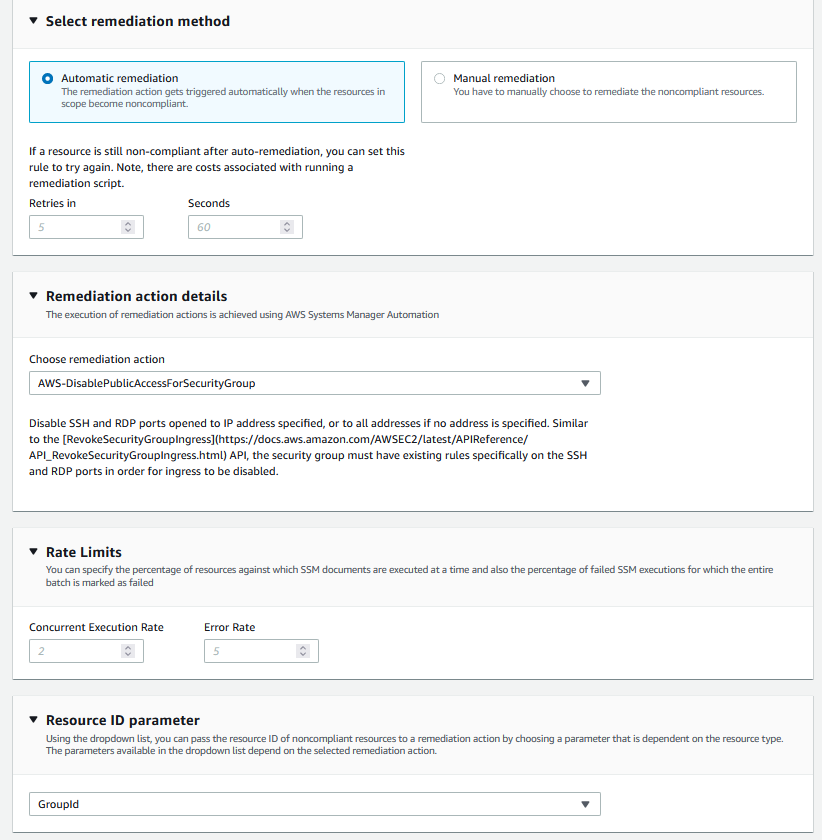
Now, establish the configuration for auto remediation in AWS Config:
- In the AWS Config console’s left-hand menu, select “Rules,” and choose “restricted-ssh.”
- Under Actions, click on “Manage remediation.”

3. Opt for “Automatic Remediation” in the Edit: Remediation Action section, and select “AWS-DisablePublicAccessForSecurityGroup.”
4. For the Parameters, map the security group to the GroupID parameter and use the ARN of the ConfigAutoRemediation role for the AutomationAssumeRole parameter.
5. You can leave the IpAddressToBlock parameter unchanged. Save the changes.
To test the automation and create an SSH ingress rule:
- Navigate to the EC2 console, select “Security Groups,” and click on the “Create security group” button.
- Enter the name “OpenSSHRuleTest” for the security group.
- Add an inbound rule by selecting “Add Rule,” then choose “SSH” for the Type and “Anywhere” for the Source.
- Finally, click on “Create security group.”
Now, monitor the compliance status of the restricted-ssh rule in the AWS Config console. It should transition from compliant to noncompliant and back to complaint within minutes. Verify the removal of the SSH ingress rule by returning to the security group.
In summary, utilizing AWS Config rules and Systems Manager Automation offers a potent method to strengthen security and compliance within your AWS environment. Prompt detection and resolution of configuration issues, such as exposing publicly accessible SSH ports, enable organizations to mitigate risks and uphold a resilient security stance.
 Finland
 Bangladesh